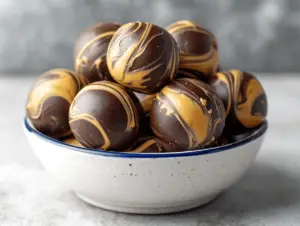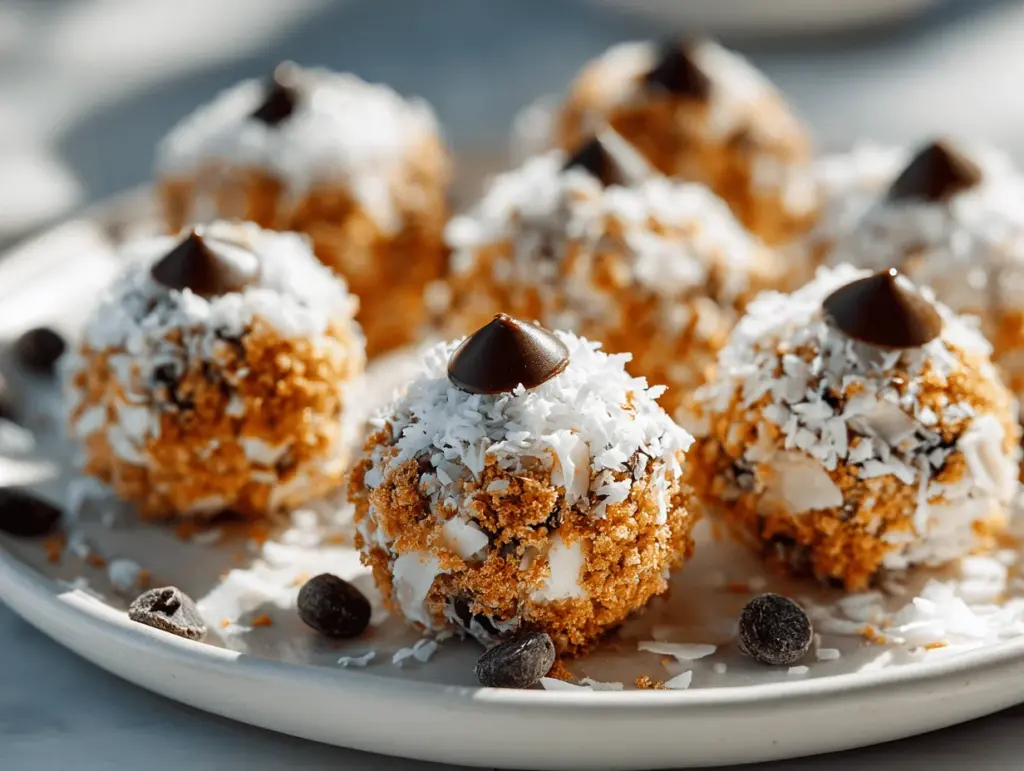
The first time I heard the name “Moose Farts,” I couldn’t help but laugh out loud. It’s the kind of silly, unforgettable name that makes you curious—what on earth are these? Well, let me tell you: Moose Farts are sweet, chewy, coconutty no-bake dessert balls that are just as fun to eat as they are to say. Every time I whip up a batch, the kitchen fills with the smell of coconut and vanilla, and I’m instantly transported to cozy nights with friends, everyone giggling about the name while sneaking just one more ball from the plate.
I stumbled on this Moose Farts recipe easy no-bake dessert balls idea at a family potluck up in Canada (no surprise there!). My aunt, who has the best collection of quirky recipes, shared her secret, and I’ve been making these ever since. They’re the ultimate treat for busy days—you don’t need to turn on the oven, and they’re done before you know it. Plus, kids absolutely adore rolling and shaping them (and, let’s be honest, adults do too). If you’re looking for a dessert that’s quick, playful, and always a hit, this Moose Farts recipe is for you.
What I love most is how customizable these no-bake dessert balls are. Whether you want to make them extra chocolatey, gluten-free, or a little more decadent, it’s surprisingly simple to tweak the ingredients. I’ve made hundreds of these over the years for bake sales, birthday parties, and even as a midnight snack. If you’re craving something sweet, easy, and guaranteed to bring a smile, you have to try this Moose Farts recipe easy no-bake dessert balls. Trust me, one bite and you’ll be hooked!
Why You’ll Love This Moose Farts Recipe Easy No-Bake Dessert Balls
When I say this recipe is a keeper, I mean it! Over the years, I’ve tested dozens of no-bake treats, but these Moose Farts stand out for so many reasons. Here’s why you’ll want to make them again and again:
- Ridiculously Easy: No oven, no fancy techniques, no special skills—just mix, roll, and chill. Even my kids can make them without a mess (well, most of the time!).
- Quick Cleanup: You only need a bowl, a spoon, and a baking sheet. Fewer dishes, more fun.
- Perfect for Any Occasion: Whether it’s a school bake sale, a family movie night, or just a sweet treat after dinner, these little dessert balls fit right in.
- Crowd-Pleaser: The chewy, coconut-rich flavor and playful name mean everyone wants to try them. I always get requests for the recipe!
- Customizable: Swap out ingredients for dietary needs—make them gluten-free, nut-free, or add your favorite flavors. I’ll share plenty of options below.
- Make-Ahead Friendly: Store them in the fridge or freezer for days (if they last that long). They’re perfect for prepping ahead of parties or holidays.
- Fun to Make: Rolling the mixture into balls with your hands is oddly satisfying—kids love helping, and it’s a great way to get everyone involved in the kitchen.
What truly sets this Moose Farts recipe easy no-bake dessert balls apart is the texture and flavor balance. The coconut gives a chewy bite, the graham crumbs add just enough structure, and the sweetened condensed milk brings everything together in a rich, creamy blend. I’ve tried versions with crushed cookies, different extracts, and even a dash of sea salt on top. Each tweak brings something new, but the classic combo is hard to beat.
Honestly, these dessert balls are more than just a quick treat—they’re a conversation starter, a nostalgic snack, and a guaranteed hit at any gathering. If you’re searching for a dessert that’s as fun as it is delicious (and won’t keep you tied to the kitchen), this Moose Farts recipe is the answer. Fun name, fantastic taste, and zero stress—what’s not to love?
What Ingredients You Will Need
This Moose Farts recipe uses simple ingredients you probably have in your pantry—no hard-to-find stuff here. Each component brings something special, and I’ll share my favorite brands and swap ideas for each one. Here’s what you’ll need:
- Shredded Sweetened Coconut (2 cups / 170g) – This is the star of the show! I prefer Baker’s or Bob’s Red Mill. The sweetened version keeps the balls chewy and perfectly sweet. You can use unsweetened if you want to cut back on sugar, but the texture will be a bit drier.
- Graham Cracker Crumbs (1 cup / 100g) – These add structure and a mild, toasty flavor. I usually crush whole graham crackers in a zip-lock bag, but store-bought crumbs work just fine. For a gluten-free version, use gluten-free graham-style crackers like Kinnikinnick.
- Mini Chocolate Chips (1/2 cup / 85g) – Tiny chips are best for even distribution, but regular chocolate chips chopped up work too. I love using semi-sweet, but milk or dark chocolate is great if you prefer.
- Sweetened Condensed Milk (1 can, 14 oz / 396g) – This is the magic binder. It brings everything together, keeps the balls moist, and adds that irresistible creamy sweetness. Eagle Brand is my go-to, but any brand does the trick.
- Vanilla Extract (1 teaspoon / 5ml) – A splash of vanilla boosts the flavor and makes these taste homemade. Feel free to add a little more if you’re a vanilla lover.
- Pinch of Salt (optional) – Just a tiny bit can round out the sweetness and make all the flavors pop. I use fine sea salt, but regular table salt is fine.
- Optional Toppings:
- Cocoa powder (for dusting, adds a chocolatey finish)
- Extra shredded coconut (for rolling, makes them look pretty and adds a little more chew)
- Sprinkles (especially for kids’ parties—super fun!)
Ingredient Notes & Swaps:
- Want to make these nut-free? You’re good—there are no nuts in the base recipe, but always check your ingredient labels.
- For a dairy-free version, try sweetened condensed coconut milk. I’ve tested it and it works well, though the texture is slightly softer.
- Need low-sugar? Use unsweetened coconut and sugar-free condensed milk, but expect the flavor to be a bit less classic.
- Swap vanilla for almond or coconut extract for a different twist—just go light, as extracts can be powerful.
- Feeling adventurous? Add a spoonful of peanut butter or Nutella for something extra special. I do this sometimes for adults-only parties, and it’s always a hit.
Bottom line: these Moose Farts dessert balls are super forgiving, so use what you have and make them your own!
Equipment Needed
You don’t need a fancy kitchen to make Moose Farts—honestly, that’s one of the best parts. Here’s what I always use, plus a few budget-friendly tips:
- Large Mixing Bowl – For combining everything. If you have a deep bowl, it helps keep the mixture from flying everywhere when stirring.
- Sturdy Mixing Spoon or Silicone Spatula – I love using a silicone spatula for scraping down the sides. Any strong spoon will do.
- Measuring Cups and Spoons – Accurate measuring helps keep the texture right. If you’re eyeballing, just make sure the condensed milk isn’t too much or too little.
- Baking Sheet – For lining up your finished balls before chilling. A cutting board or large plate works in a pinch.
- Parchment Paper or Wax Paper – Keeps the balls from sticking and makes cleanup easy. If you don’t have any, a lightly greased tray is fine.
- Small Cookie Scoop or Tablespoon – Helps portion evenly. I’ve made these with just my hands and a regular spoon plenty of times!
Personal tip: If you’re making a double batch, use two bowls—one for mixing, one for rolling. And, don’t bother with a food processor; hand-mixing keeps the texture perfect and means fewer dishes. If you’re on a budget, dollar-store utensils work just fine for this recipe. Just be sure to rinse your tools quickly before the mixture dries—it’s sticky stuff!
Preparation Method
-
Prepare Your Work Area (2 minutes):
Line a baking sheet with parchment or wax paper. This keeps the Moose Farts dessert balls from sticking and makes cleanup a breeze. Have your mixing bowl, spoon, and ingredients ready to go. -
Mix the Dry Ingredients (3 minutes):
In a large bowl, combine 2 cups (170g) shredded sweetened coconut, 1 cup (100g) graham cracker crumbs, and 1/2 cup (85g) mini chocolate chips. Stir until everything’s evenly mixed. If you want to add a pinch of salt, now’s the time.
Tip: Break up any coconut clumps with your fingers for even texture. -
Add the Wet Ingredients (2 minutes):
Pour in 1 can (14 oz / 396g) sweetened condensed milk and 1 teaspoon (5ml) vanilla extract. Stir everything together with a sturdy spoon or spatula. The mixture will get thick and sticky—that’s exactly what you want.
Note: If the mix seems too dry, add an extra tablespoon of condensed milk. Too wet? Sprinkle in more coconut or graham crumbs, a tablespoon at a time. -
Chill the Mixture (10-15 minutes):
Pop the bowl in the fridge for 10-15 minutes. This makes it much easier to roll into balls, especially if your kitchen is warm.
Warning: Don’t skip this step—warm mix will stick to your hands like crazy! -
Shape the Balls (10 minutes):
Scoop out heaping tablespoonfuls (about 20g each) and roll between your hands to form balls, about 1 inch (2.5 cm) in diameter. Place each one on the lined baking sheet.
Tip: Lightly dampen your hands with cold water to keep the mixture from sticking. -
Finish with Toppings (optional, 5 minutes):
Roll some balls in extra shredded coconut, cocoa powder, or colorful sprinkles for a fun look and added flavor. This step is totally optional but makes them look even cuter for parties or Pinterest photos! -
Chill to Set (at least 30 minutes):
Refrigerate the finished Moose Farts for 30 minutes before serving. This helps them hold their shape and makes them extra chewy.
Sensory Cue: When they’re ready, they’ll feel firm but soft when squeezed gently.
Troubleshooting: If the balls are falling apart, add a bit more condensed milk. If they’re too sticky, chill longer or roll in coconut. If you want them firmer, freeze for 10-15 minutes before serving. And remember—imperfections just make them more homemade!
Cooking Tips & Techniques
Even a “no-bake” treat has its tricks! After making countless batches of Moose Farts, I’ve picked up these helpful tips:
- Chill for Ease: The colder the mixture, the easier it is to roll into neat balls. If you’re working in a hot kitchen, chill your hands under cold water before shaping.
- Consistent Sizing: Use a cookie scoop or tablespoon to keep each ball the same size. This makes for even chilling and a prettier platter. (I’ve had wonky-shaped ones—still delicious!)
- Don’t Overmix: Stop stirring once everything’s just combined. Overmixing can make the balls dense or oily.
- Mix-Ins Last: If you want to add extras like nuts or dried fruit, fold them in after the wet ingredients so they don’t sink or clump.
- Mini Chips for the Win: Mini chocolate chips distribute evenly so every bite has chocolate. Regular chips sometimes clump up, but you can chop them smaller if needed.
- Hands-On Tip: Wipe your hands clean or rinse with cold water every 4-5 balls. It keeps the rolling easy and less sticky.
- For Perfect Party Balls: Roll finished balls in coconut or sprinkles just before serving to keep them looking fresh and festive.
Common Mistakes & Fixes:
- Mixture too loose? Add more coconut or crumbs, a tablespoon at a time.
- Too firm? Drizzle in a bit more condensed milk.
- Balls sticking to the tray? Use extra parchment or dust with coconut.
I’ve made the mistake of skipping the chilling step—big mess! Don’t do what I did. Chill, roll, and chill again for best results. Plus, if you’re multitasking, you can prep the mixture, let it chill, and come back to it whenever you’re ready—so forgiving!
Variations & Adaptations
One of the best things about this Moose Farts recipe easy no-bake dessert balls is how endlessly adaptable it is. Here are my favorite ways to switch things up:
- Gluten-Free: Swap regular graham cracker crumbs for gluten-free ones. I use Kinnikinnick or Schär, and no one can tell the difference!
- Chocolate Lovers: Substitute half the coconut with finely chopped walnuts and roll the balls in cocoa powder. It’s a fudgy, decadent twist (and a personal favorite when I want something richer).
- Dairy-Free: Use sweetened condensed coconut milk instead of regular. The flavor gets a subtle coconut boost and the texture stays nice and chewy.
- Holiday Flair: Add 1/4 teaspoon peppermint extract and roll in red/green sprinkles for a festive Christmas treat.
- Fruit Burst: Fold in 1/4 cup chopped dried cranberries or cherries for a tart, chewy contrast.
- Nutty Crunch: Add 1/4 cup finely chopped toasted pecans or almonds for added texture (just check for allergies if serving to a crowd).
Cooking Method Notes: You don’t need to bake these, but freezing them for 10 minutes after rolling gives a firmer bite (great for hot weather or party trays). If you’re feeling fancy, drizzle with melted chocolate for a more decadent finish.
I once made a batch with coconut extract, dark chocolate chips, and a sprinkle of sea salt—the sweet and salty combo was unreal! Don’t be afraid to experiment; these dessert balls are very forgiving.
Serving & Storage Suggestions
For the best Moose Farts experience, serve these no-bake dessert balls chilled—they hold their shape and taste super refreshing. Here’s how I like to present and store them:
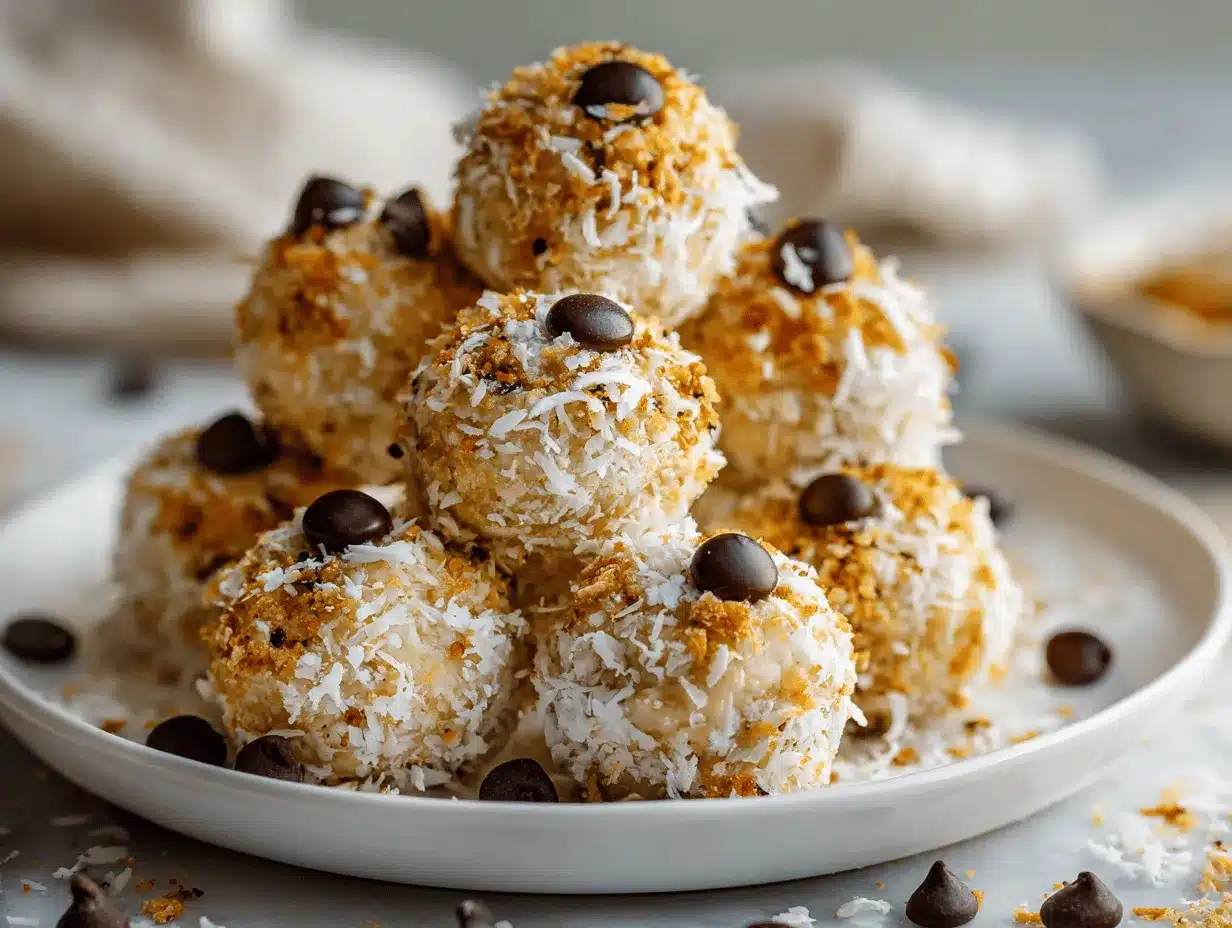
- Serving: Arrange the balls on a colorful platter or a wooden board lined with parchment. For parties, add a sprinkle of extra coconut or drizzle with a little melted chocolate. They look adorable in mini cupcake liners for easy grabbing.
- Pairings: Serve with coffee, hot chocolate, or cold milk for a dreamy snack. I’ve even paired them with a scoop of vanilla ice cream for a quick, quirky dessert.
- Storage: Keep Moose Farts in an airtight container in the fridge for up to 5 days. They taste even better after a day or two when the flavors meld together.
- Freezing: Freeze in a single layer on a tray, then transfer to a zip-top bag or airtight container. They’ll keep for 2-3 months—just thaw in the fridge before serving.
- Reheating: No need! These are best enjoyed cold or at room temp. If they feel too firm straight from the freezer, let them sit out for 10 minutes before eating.
Flavor tip: If you like a softer texture, let the balls sit at room temperature for 5-10 minutes before serving. And if you’re making them for a party, prep a day ahead—the flavor only gets better!
Nutritional Information & Benefits
While Moose Farts are definitely a treat, they do offer some perks from their ingredients:
- Estimated Nutrition (per ball, approx. 20g): About 90 calories, 5g fat, 10g carbs, 1g protein, 7g sugar.
- Coconut: Adds fiber, healthy fats, and a satisfying chew.
- No Artificial Ingredients: Made with pantry staples—no hidden preservatives or weird stuff.
- Dietary Options: Easily made gluten-free or dairy-free with simple swaps.
Allergen Alert: Contains dairy (condensed milk) and gluten (graham crumbs, unless using GF option). Always double-check labels if making for someone with allergies.
From a wellness perspective, I love that you can make these Moose Farts dessert balls in bite-size portions—just enough to satisfy a sweet tooth without overdoing it. And hey, a little coconut now and then is a good thing!
Conclusion
Let’s face it—dessert should be fun, and this Moose Farts recipe easy no-bake dessert balls is as playful as it gets. Whether you’re making them for a party, a lunchbox treat, or just because you need something sweet, they’re quick, simple, and always a crowd favorite. I love how easy it is to tweak the flavors and ingredients to match any craving or dietary need.
Give these a try and don’t be afraid to make them your own. I’d love to hear how you customize them—maybe you’ll invent the next great Moose Farts flavor! Honestly, these are the treats I reach for when I want to make people smile (and sneak a sweet bite for myself). Don’t forget to leave a comment below sharing your favorite twist on the recipe, or tag me on Pinterest if you post your own batch. Happy no-baking, friends—here’s to more giggles and good snacks in your kitchen!
Frequently Asked Questions
How long do Moose Farts no-bake dessert balls last?
They’ll keep fresh in the fridge for up to 5 days, or you can freeze them for up to 3 months. Just store in an airtight container and thaw in the fridge before serving for best texture.
Can I make Moose Farts gluten-free?
Absolutely! Just use gluten-free graham cracker crumbs. All other ingredients are naturally gluten-free, so it’s an easy swap.
What if I don’t have sweetened condensed milk?
You really need the condensed milk for the right texture and sweetness, but you can use sweetened condensed coconut milk for a dairy-free version. Regular milk or cream won’t work the same way.
Can I make Moose Farts ahead of time?
Yes, they’re perfect for prepping in advance. I often make them a day before a party since the flavor gets even better as they chill.
Can I add nuts or dried fruit to the recipe?
Definitely! Chopped nuts or dried fruit add a nice twist. Just fold them in after the wet ingredients and before rolling into balls. Be mindful of allergies if serving a group.
Pin This Recipe!
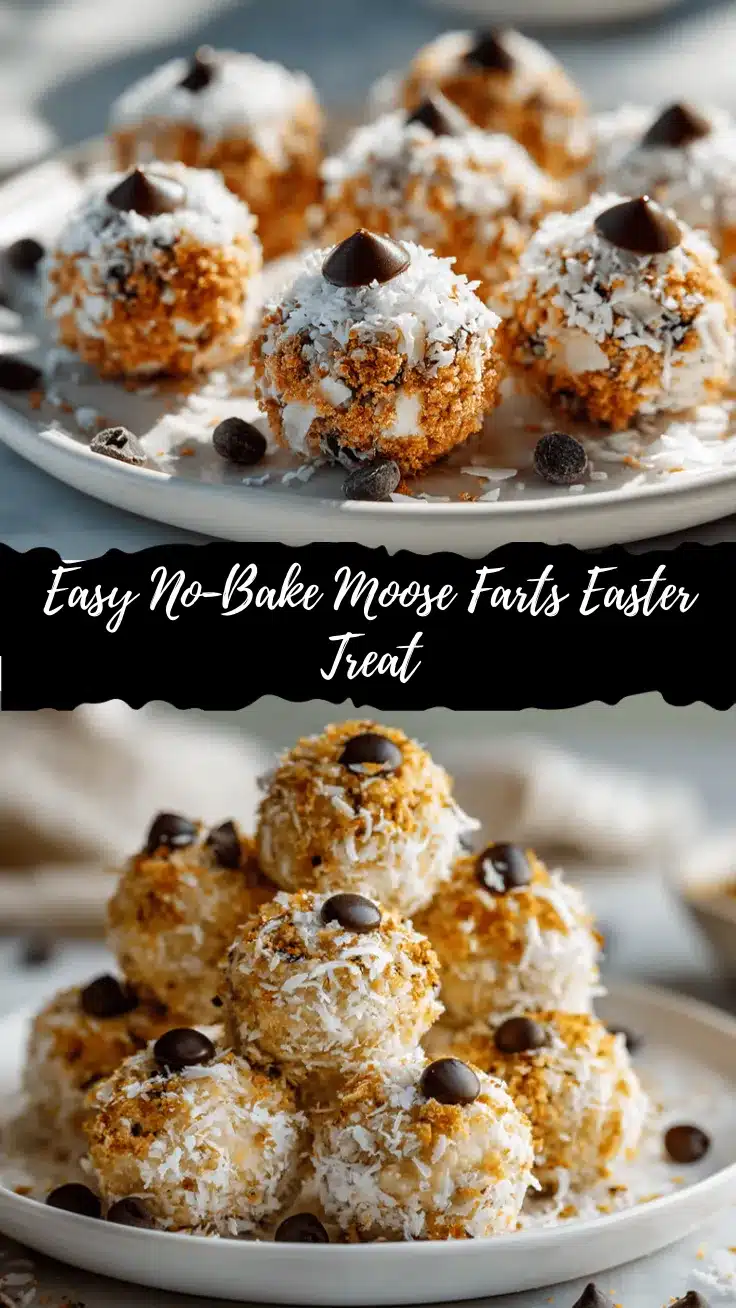

Moose Farts Recipe Easy No-Bake Dessert Balls Everyone Loves
- Total Time: 45 minutes
- Yield: 24 balls 1x
Description
Moose Farts are sweet, chewy, coconutty no-bake dessert balls that are quick to make and always a crowd-pleaser. With simple pantry ingredients and no oven required, these playful treats are perfect for parties, potlucks, or a fun family snack.
Ingredients
- 2 cups shredded sweetened coconut
- 1 cup graham cracker crumbs
- 1/2 cup mini chocolate chips
- 1 can (14 oz) sweetened condensed milk
- 1 teaspoon vanilla extract
- Pinch of salt (optional)
- Optional toppings: cocoa powder, extra shredded coconut, sprinkles
Instructions
- Line a baking sheet with parchment or wax paper. Gather all equipment and ingredients.
- In a large bowl, combine shredded coconut, graham cracker crumbs, and mini chocolate chips. Stir until evenly mixed. Add a pinch of salt if desired.
- Pour in sweetened condensed milk and vanilla extract. Stir with a sturdy spoon or spatula until the mixture is thick and sticky.
- Chill the mixture in the fridge for 10-15 minutes to make it easier to handle.
- Scoop out heaping tablespoonfuls (about 1 inch in diameter) and roll between your hands to form balls. Place on the lined baking sheet.
- Roll balls in extra coconut, cocoa powder, or sprinkles if desired.
- Refrigerate the finished balls for at least 30 minutes before serving to set.
Notes
Chill the mixture before rolling for easier handling. For gluten-free, use gluten-free graham cracker crumbs. For dairy-free, use sweetened condensed coconut milk. Store in the fridge for up to 5 days or freeze for up to 3 months. Roll in coconut or sprinkles for a festive look.
- Prep Time: 15 minutes
- Cook Time: 0 minutes
- Category: Dessert
- Cuisine: Canadian
Nutrition
- Serving Size: 1 ball (about 20g)
- Calories: 90
- Sugar: 7
- Sodium: 30
- Fat: 5
- Saturated Fat: 4
- Carbohydrates: 10
- Fiber: 1
- Protein: 1
Keywords: moose farts, no-bake dessert balls, coconut balls, Canadian dessert, easy dessert, potluck treat, kid-friendly dessert, no bake recipe, sweet snack, party dessert