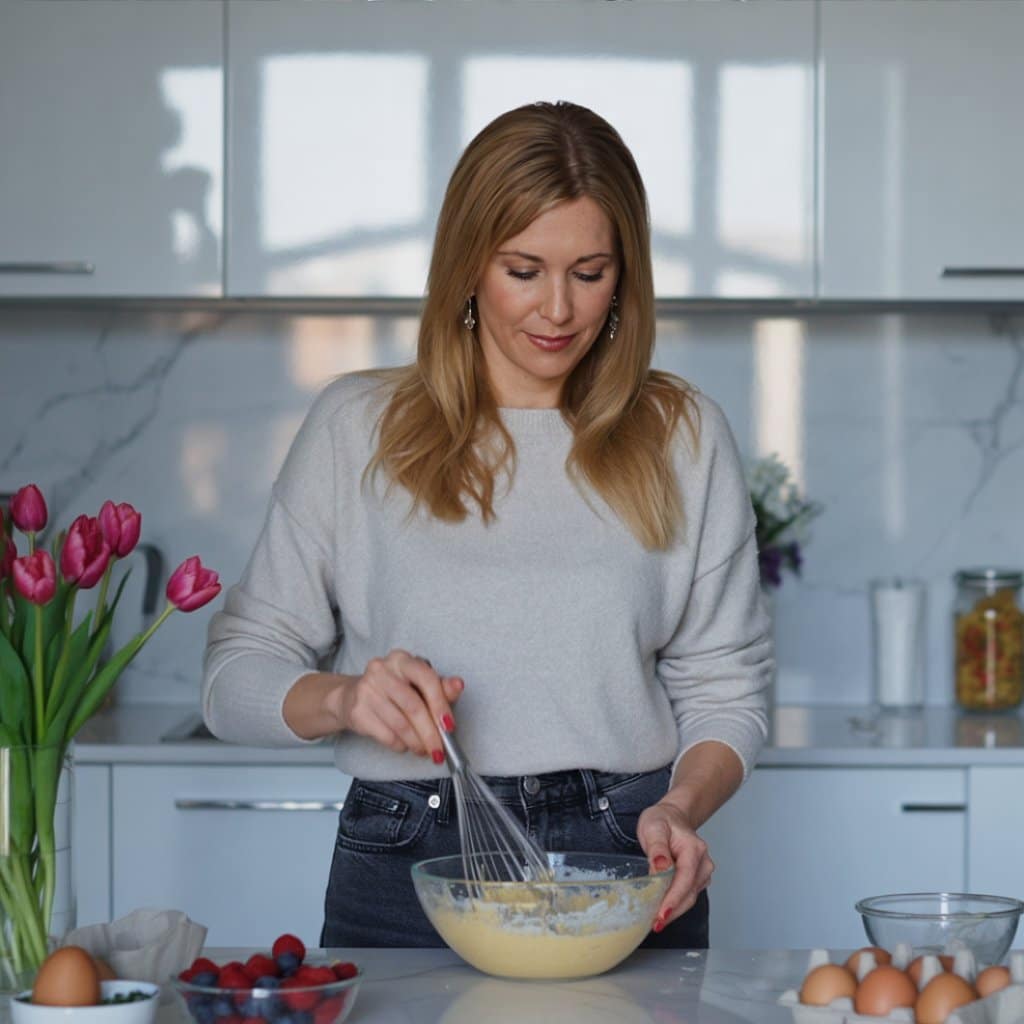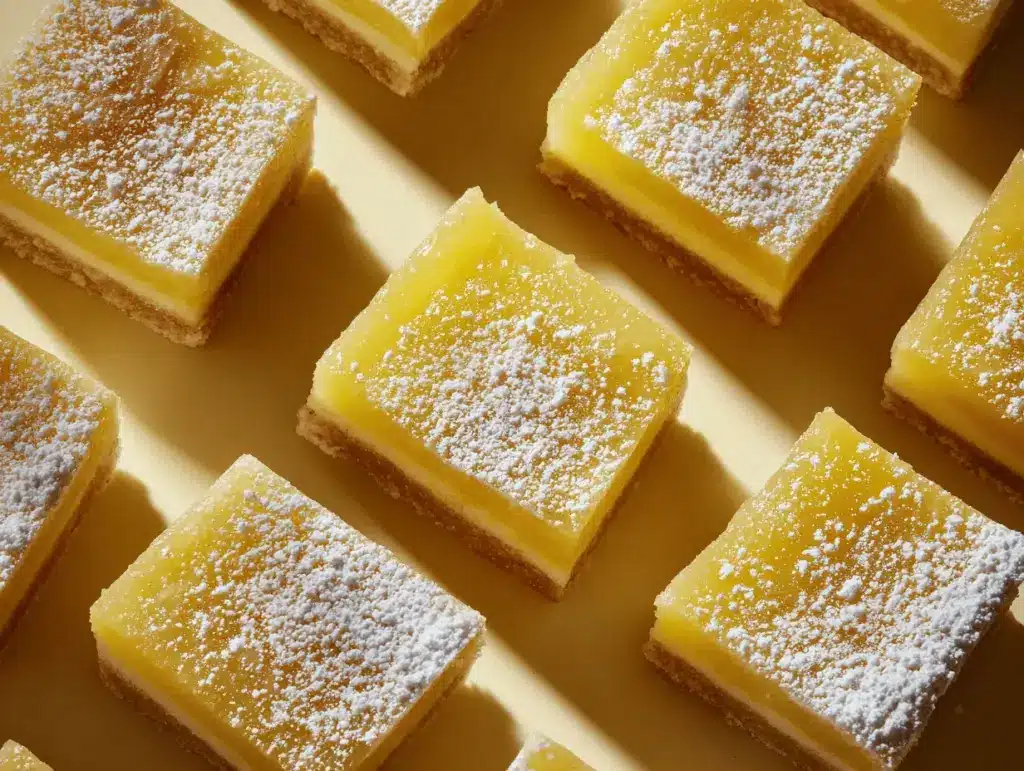
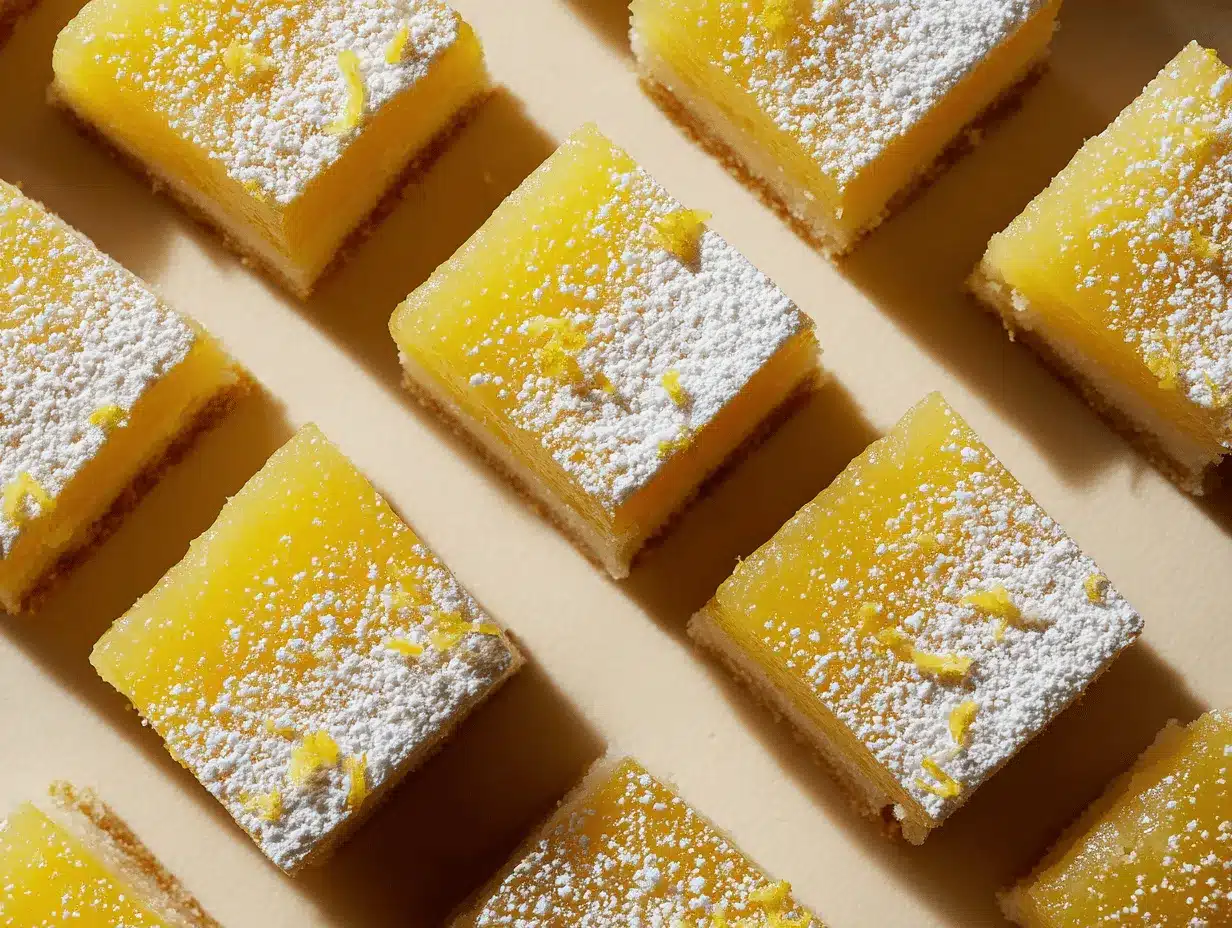
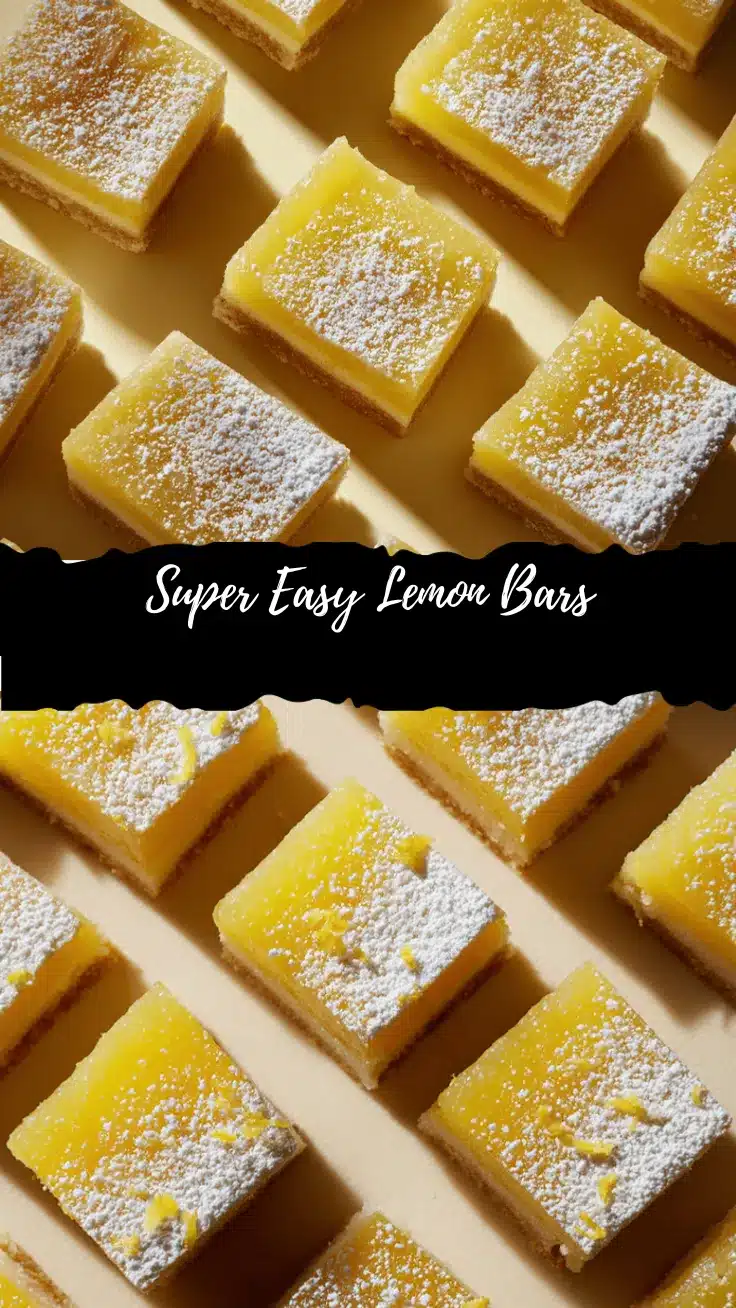
The zingy scent of fresh lemons always makes my kitchen feel like a sun-drenched summer afternoon. The first bite of these irresistible, super easy lemon bars—egg-free, golden, and dusted with a cloud of powdered sugar—reminds me of family picnics and the simple joys of homemade treats. No joke, I stumbled upon this recipe during a wild quest to bake for a friend with an egg allergy. Lemon bars without eggs? It sounded almost impossible until a little kitchen experimenting proved me wrong (and oh boy, was everyone glad I tried).
I’ve made these lemon bars more times than I can count. They’re a staple at my summer gatherings, and honestly, even my “lemon skeptic” husband looks forward to them. There’s something magical about the way the tart lemon filling meets the buttery shortbread base—especially when you realize there’s no egg in sight! This recipe is my go-to for potlucks, birthdays, and those days when I’m craving something bright and sweet but don’t want a big fuss.
If you’re on the hunt for an easy lemon bars recipe that’s homemade, egg-free, and perfect for summer, you’re in the right spot. The best part? You don’t need fancy ingredients or special skills. I’ll guide you every step of the way, sharing all the tips I’ve picked up through trial, error, and a whole lot of taste testing. These lemon bars are ideal for busy families, anyone with allergies, or anyone who just loves a classic dessert with a twist. Trust me—once you try them, you’ll want to bake a double batch next time.
Why You’ll Love This Recipe
- Super Simple and Quick: No complicated steps, and you can have these bars ready in just over an hour (including cooling time!). Perfect when you want homemade lemon bars fast.
- Egg-Free and Allergy-Friendly: No eggs or nuts, making this lemon bars recipe a safe choice for gatherings where allergies might be a concern.
- Bright, Fresh Flavor: The filling is tart, sweet, and bursting with real lemon—no bottled stuff here! Even people who claim they’re “not lemon fans” can’t resist.
- Delicious Texture: The shortbread crust is crisp and buttery, while the lemon filling is creamy and just the right amount of gooey.
- Perfect for Any Occasion: Ideal for summer picnics, bake sales, brunches, or just a sunny afternoon treat. These lemon bars are always a conversation starter.
- Kid-Approved: My kids gobble these up and love helping sprinkle the powdered sugar on top. They even ask for them as birthday treats!
- Customizable: You can switch up the crust, add a berry swirl, or play with the citrus for a twist. More on that in the variations section below.
What sets this egg-free lemon bars recipe apart is the clever use of cornstarch and condensed milk for that silky, custard-like filling—without needing eggs. I’ve tested countless versions, and this one nails the perfect balance of tart, sweet, and creamy. There’s no worrying about curdling or weird textures. Just pure, summery joy in every bite.
This isn’t just another lemon bar recipe. It’s the kind of treat that turns a regular afternoon into a mini celebration. I’ve shared it at family gatherings, potlucks, and even as a “thinking of you” gift for friends. Every single time, people ask for the recipe—and honestly, that’s the best review I could ever hope for!
What Ingredients You Will Need
This lemon bars recipe keeps things straightforward—no hunting for rare ingredients or making multiple trips to the store. Here’s what you’ll need for the easiest, most irresistible egg-free lemon bars:
- For the Shortbread Crust:
- All-purpose flour (1 1/2 cups / 190g) – The base of your crust, giving it structure and crispness. Use a gluten-free blend if needed.
- Powdered sugar (1/2 cup / 60g) – Adds sweetness and that signature melt-in-your-mouth texture.
- Unsalted butter, melted (3/4 cup / 170g) – I like to use a high-quality European-style butter for extra richness. If you’re dairy-free, plant-based butter works, too.
- Salt (1/4 tsp) – Just a pinch brightens the flavors and keeps the crust from tasting flat.
- Lemon zest (1 tsp, optional) – For a pop of citrus in the crust. Totally optional, but highly recommended if you love extra lemony goodness.
- For the Lemon Filling:
- Sweetened condensed milk (1 can, 14 oz / 396g) – This is the magic ingredient for creamy, egg-free lemon bars. Don’t swap for evaporated milk—it won’t set the same way.
- Fresh lemon juice (1/2 cup / 120ml, about 2-3 large lemons) – Squeeze your own for bright, tangy flavor. Bottled juice just doesn’t have the same punch.
- Lemon zest (2 tsp) – This ramps up the citrus flavor. I use a microplane and zest the lemons before juicing.
- Cornstarch (1/4 cup / 32g) – Acts as a thickener, replacing the eggs and helping the filling to set perfectly. No runny bars here!
- Granulated sugar (1/3 cup / 65g) – Adjust to taste depending on your lemon’s tartness. If you like it extra tangy, you can use a bit less.
- Salt (1/4 tsp) – Again, just a touch rounds out the flavor.
- Vanilla extract (1 tsp) – Optional, but it adds a soft, mellow background note that pairs beautifully with the lemon.
- For Dusting:
- Powdered sugar (2-3 tbsp) – For that classic, snowy finish. Sift it on just before serving.
If you need to make swaps, here are a few tried-and-true options:
- Gluten-free flour blend for the crust (I like King Arthur or Cup4Cup).
- Plant-based butter for a dairy-free version.
- Lime juice and zest for a fun twist if you’re out of lemons.
I always recommend using fresh lemons for the best flavor, but in a pinch, bottled lemon juice works—just taste and adjust the sugar as needed. And if you want to get fancy, try adding a swirl of raspberry jam before baking. It’s gorgeous and so summery!
Equipment Needed
- 8×8-inch baking pan (20x20cm): The classic size for lemon bars. You can use a 9×9-inch pan, but your bars will be a bit thinner and may bake faster.
- Parchment paper: Makes removing the bars from the pan a breeze—just lift and cut. I always line my pan for easy cleanup (and tidy edges!).
- Mixing bowls: At least two—one for the crust, one for the filling. Glass or stainless steel both work well.
- Whisk and spatula: For mixing the filling until smooth. A silicone spatula is perfect for scraping every last bit.
- Measuring cups and spoons: Precise measurements really matter for the perfect texture, especially with the cornstarch.
- Microplane or fine grater: For zesting lemons. If you don’t have one, a regular box grater on the fine side will work.
- Cooling rack: Helps the bars cool quickly and evenly (but if you don’t have one, just set the pan on a folded towel).
- Sharp knife: For cutting clean squares. I like to run mine under hot water and wipe between cuts for the prettiest bars.
If you’re short on tools, you can press the crust in with your hands, and mix the filling with a big spoon. I’ve done it in a pinch! For a pan, even a glass dish or disposable foil pan will work—just watch the baking time, as glass sometimes bakes a little slower. And if you’re a fan of gadgets, an offset spatula is awesome for smoothing the filling, but not required.
Preparation Method
- Prep the Pan: Line your 8×8-inch (20x20cm) pan with parchment paper, leaving a slight overhang on two sides. This makes lifting out the lemon bars super easy, trust me!
- Make the Shortbread Crust:
- In a medium bowl, mix 1 1/2 cups (190g) flour, 1/2 cup (60g) powdered sugar, 1/4 tsp salt, and 1 tsp lemon zest (if using).
- Pour in 3/4 cup (170g) melted unsalted butter. Stir with a spatula or fork until it looks like coarse, damp sand—no dry spots.
- Dump the mixture into your lined pan. Use your hands or the bottom of a measuring cup to press it down evenly. Get into those corners for a tidy edge!
- Bake the crust at 350°F (175°C) for 18-20 minutes, until lightly golden at the edges. It should look set but not hard. (If your oven runs hot, check at 16 minutes.)
- Mix the Lemon Filling:
- While the crust bakes, whisk together 1 can (14 oz/396g) sweetened condensed milk, 1/2 cup (120ml) fresh lemon juice, 2 tsp lemon zest, 1/4 cup (32g) cornstarch, 1/3 cup (65g) granulated sugar, 1/4 tsp salt, and 1 tsp vanilla extract (if using) in a clean bowl.
- Whisk until completely smooth—no lumps! It should look glossy and pourable. If it feels too thick, add a tablespoon of lemon juice or water at a time.
- Taste the filling (just a dab)—if it’s too tart, add a pinch more sugar.
- Assemble and Bake:
- Remove the crust from the oven. Give it a couple of minutes to cool, but don’t let it get cold—it should be warm, not hot.
- Pour the lemon filling over the warm crust. Use a spatula to spread it evenly. Tap the pan gently to pop any air bubbles.
- Return to the oven and bake at 350°F (175°C) for 22-26 minutes, until the edges are set and the center barely jiggles when shaken. Don’t overbake—it’ll continue to set as it cools.
- Cool and Chill:
- Let the pan cool on a rack for 1 hour at room temperature, then transfer to the fridge for at least 2 hours (overnight is even better!). This helps the filling firm up so you get clean slices.
- Slice and Serve:
- Use the parchment overhang to lift the bars out of the pan.
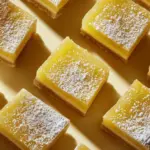
- Dust generously with powdered sugar—use a sifter for a pretty, even layer.
- Cut into 16 squares with a sharp knife, wiping the blade between cuts for neat edges.
Troubleshooting: If your bars seem runny, they probably just need more chilling time. If the crust cracks while pressing it in, patch it together (nobody will know!). If the filling looks lumpy before baking, keep whisking until smooth—cornstarch can be stubborn, but it’ll get there. And don’t skip the chilling step; it seriously makes all the difference.
Cooking Tips & Techniques
- Use Room Temperature Ingredients: This helps everything blend smoothly, especially the condensed milk and lemon juice.
- Don’t Overbake: The filling should still have a little wobble in the center when you take it out. If it sets hard in the oven, it’ll be too firm after chilling.
- Chill Completely: I know it’s tempting to dive in, but chilled bars slice so much cleaner and the flavors meld together beautifully.
- Line the Pan Well: Parchment paper is your best friend here. It makes removing and slicing the bars a thousand times easier—I learned that the hard way when my first batch stuck like crazy.
- Don’t Rush the Whisk: Cornstarch needs to be fully dissolved to avoid any clumps. Whisk until the mixture is silky.
- Personal Fail: Once, I tried using bottled lemon juice and forgot to taste for tartness. Big mistake—it tasted flat. Always taste the filling and adjust as needed!
- For Pretty Bars: Wipe your knife between cuts and dust the bars with sugar just before serving to keep them looking fresh.
- Multitasking: Mix the filling while the crust is in the oven to save time. The filling comes together in minutes.
If you follow just one piece of advice, let it be this: don’t skip chilling the bars! It’s the difference between a gooey mess and that perfect, creamy slice. Trust me, I’ve made enough batches to know!
Variations & Adaptations
- Gluten-Free Lemon Bars: Use a gluten-free all-purpose flour blend in place of regular flour for the crust. I’ve done this several times for friends, and nobody could tell the difference.
- Dairy-Free Version: Swap the butter for plant-based butter, and use a dairy-free sweetened condensed milk like coconut condensed milk. The result is just as creamy, with a subtle coconut twist.
- Lime or Orange Bars: Use the same method with fresh lime or orange juice and zest for a new flavor profile. My family loves a lime version with a little extra zest in the crust.
- Berry Swirl: Dollop a few teaspoons of raspberry or blueberry jam on the filling and swirl with a toothpick for a lovely marbled effect.
- Allergen Substitutions: For nut allergies, this recipe is naturally nut-free. For soy allergies, just double-check your butter and condensed milk labels.
One of my favorite personal twists is to add a little shredded coconut to the crust for a tropical flavor. I’ve also tried adding poppy seeds to the filling—so pretty and such a fun texture! Don’t be afraid to play around and make these lemon bars your own.
Serving & Storage Suggestions
I always serve these lemon bars chilled—they’re extra refreshing that way. For a pretty presentation, dust with powdered sugar just before serving (it can melt if you do it too far ahead). Arrange the bars on a platter with fresh lemon slices or edible flowers for a Pinterest-worthy look.
Pair these bars with a glass of iced tea, sparkling lemonade, or even a scoop of vanilla ice cream for an extra treat. They’re perfect for brunch, picnics, or as a sweet finish to a summer BBQ.
Store leftovers in an airtight container in the fridge for up to 5 days. The flavors actually deepen after a day or two—so if you can resist, they’re even tastier! For longer storage, freeze individual bars (wrapped well) for up to 2 months. Thaw in the fridge overnight and dust with fresh sugar before serving. To reheat, honestly, I don’t recommend it—these are best enjoyed cold or at room temperature.
Nutritional Information & Benefits
Each lemon bar (based on 16 squares) is roughly 180 calories, with 6g fat, 30g carbs, and 2g protein. These bars are egg-free and nut-free, making them a safer dessert for those with common allergies. If you use gluten-free or dairy-free swaps, they can fit even more dietary needs.
Lemons are a great source of vitamin C and antioxidants, and using real lemon juice gives your dessert a little nutritional bump. While these are definitely a sweet treat, they’re lighter than many classic desserts. Personally, I love that I can share these with friends who might normally skip dessert due to allergies—it feels good to make something everyone can enjoy!
Conclusion
There’s just something about these super easy, homemade lemon bars that brings a little sunshine to any table. With their egg-free filling, buttery crust, and bright, tangy flavor, they’re a summer dessert I make again and again—and I’m always glad I did.
Don’t be shy about making this recipe your own. Whether you add a berry swirl, go gluten-free, or double the lemon zest, these bars are endlessly adaptable. I hope you’ll give them a try, share them with friends, and make some sweet memories of your own.
If you make these lemon bars, please drop a comment below or tag me—nothing makes me happier than seeing your creations. Happy baking, and here’s to sunny days and sweet treats!
Frequently Asked Questions
Can I make these lemon bars ahead of time?
Absolutely! In fact, they taste even better after chilling overnight. Just keep them covered in the fridge until you’re ready to serve.
Are these lemon bars safe for people with egg allergies?
Yes, this recipe is completely egg-free! Just double-check your other ingredients for hidden allergens if needed.
Can I freeze lemon bars?
You sure can. Wrap individual bars tightly and freeze for up to 2 months. Thaw in the fridge, then dust with fresh powdered sugar before serving.
What can I use instead of sweetened condensed milk?
For a dairy-free option, use coconut condensed milk. Regular evaporated milk won’t work here—it doesn’t set the same way.
How do I keep the powdered sugar from melting?
Dust the bars with powdered sugar just before serving. If you do it too early, it can dissolve into the filling, especially if the bars are a bit moist from the fridge.
Pin This Recipe!
Lemon Bars Recipe – Easy Homemade, Egg-Free Summer Dessert
- Total Time: 3 hours
- Yield: 16 bars 1x
Description
These easy, homemade lemon bars are egg-free, bright, and tangy with a creamy lemon filling atop a buttery shortbread crust. Perfect for summer gatherings, they’re allergy-friendly and always a crowd-pleaser.
Ingredients
- 1 1/2 cups (190g) all-purpose flour (or gluten-free blend)
- 1/2 cup (60g) powdered sugar, plus 2-3 tbsp for dusting
- 3/4 cup (170g) unsalted butter, melted (or plant-based butter)
- 1/4 tsp salt (for crust)
- 1 tsp lemon zest (optional, for crust)
- 1 can (14 oz / 396g) sweetened condensed milk (or coconut condensed milk for dairy-free)
- 1/2 cup (120ml) fresh lemon juice (about 2–3 large lemons)
- 2 tsp lemon zest (for filling)
- 1/4 cup (32g) cornstarch
- 1/3 cup (65g) granulated sugar
- 1/4 tsp salt (for filling)
- 1 tsp vanilla extract (optional)
Instructions
- Preheat oven to 350°F (175°C). Line an 8×8-inch baking pan with parchment paper, leaving an overhang on two sides.
- In a medium bowl, mix flour, powdered sugar, salt, and lemon zest (if using) for the crust.
- Pour in melted butter and stir until the mixture resembles coarse, damp sand.
- Press the mixture evenly into the prepared pan, getting into the corners.
- Bake the crust for 18-20 minutes, until lightly golden at the edges. Remove and let cool slightly (should be warm, not hot).
- While the crust bakes, whisk together sweetened condensed milk, lemon juice, lemon zest, cornstarch, granulated sugar, salt, and vanilla extract (if using) until smooth and glossy.
- Taste the filling and adjust sugar if needed.
- Pour the lemon filling over the warm crust and spread evenly. Tap the pan gently to remove air bubbles.
- Bake at 350°F (175°C) for 22-26 minutes, until edges are set and center barely jiggles.
- Cool on a rack for 1 hour at room temperature, then refrigerate for at least 2 hours (overnight is best).
- Lift bars out using parchment overhang. Dust generously with powdered sugar just before serving.
- Cut into 16 squares with a sharp knife, wiping the blade between cuts for clean edges.
Notes
For best results, use fresh lemon juice and zest. Chill bars thoroughly before slicing for clean edges. Gluten-free and dairy-free substitutions work well. Dust with powdered sugar just before serving to prevent melting. Store in the fridge for up to 5 days or freeze for up to 2 months.
- Prep Time: 20 minutes
- Cook Time: 40 minutes
- Category: Dessert
- Cuisine: American
Nutrition
- Serving Size: 1 bar (1/16 of recipe)
- Calories: 180
- Sugar: 18
- Sodium: 90
- Fat: 6
- Saturated Fat: 4
- Carbohydrates: 30
- Protein: 2
Keywords: lemon bars, egg-free dessert, summer dessert, easy lemon bars, homemade lemon bars, nut-free, allergy-friendly, picnic dessert, lemon squares, shortbread crust