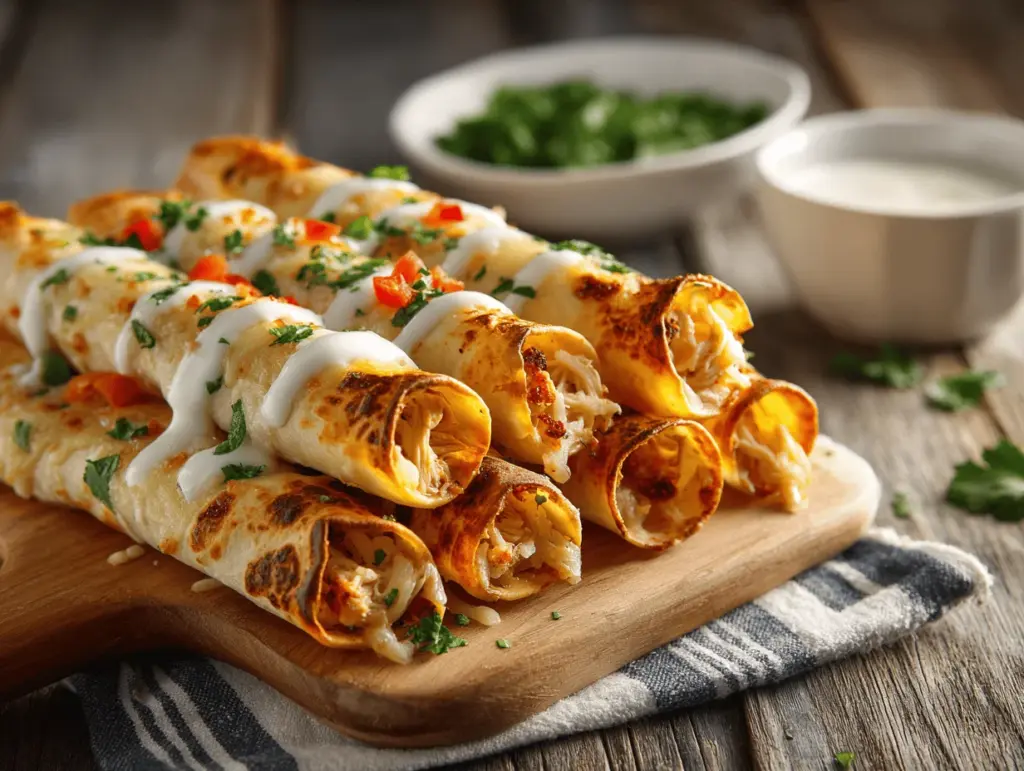
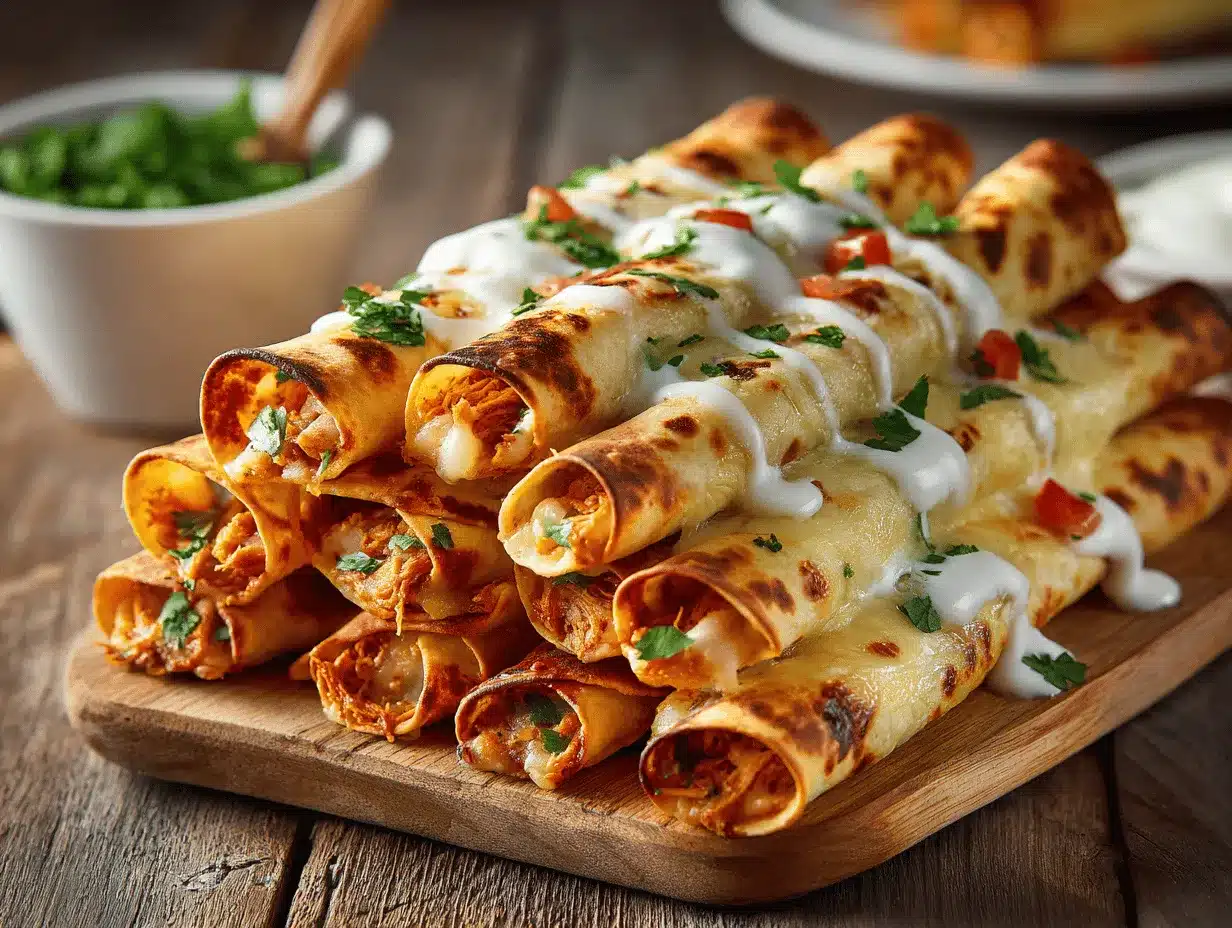
The sound of a perfectly crisp taquito crunching between your teeth? That’s pure happiness, honestly. When I first tested my homemade crispy chicken taquitos recipe, the smell of warm corn tortillas and savory shredded chicken had my family hovering in the kitchen before I could even plate them. These taquitos are golden, crunchy, and bursting with flavor—exactly the kind of creative dinner that makes everyone excited for mealtime.
I stumbled onto this recipe by accident, honestly. One night, I had leftover rotisserie chicken and a stack of corn tortillas just begging to be used. Out came the cheese, a few spices, and—bam!—crispy chicken taquitos were born. I’ve tweaked the method more times than I can count, aiming for that perfect balance: a shatteringly crisp shell and a juicy, cheesy filling. And let me tell you, this version is my absolute favorite.
Crispy chicken taquitos are a lifesaver when you need something quick but still want to feel like you cooked something special. They’re perfect for busy weeknights, picky eaters, or laid-back entertaining. Plus, they’re customizable—add your favorite toppings or swap in different proteins. Whether you’re craving a fun family dinner or want an irresistible appetizer for game night, this chicken taquitos recipe is your ticket to happy bellies and zero leftovers. Trust me, you’ll want to make a double batch!
Why You’ll Love This Recipe
After years of culinary trial and error (and a lot of taste-testing by my crew), I can say with confidence: these crispy chicken taquitos stand out from the crowd. Here’s what makes this recipe so special:
- Quick & Easy: Ready in about 30 minutes, these taquitos are perfect for weeknight dinners, last-minute guests, or satisfying late-night cravings.
- Simple Ingredients: There’s nothing fancy here—just common pantry staples and a few fridge basics. No need for a trip to a specialty store.
- Perfect for Any Occasion: These taquitos are a hit at family dinners, birthday parties, potlucks, or even as a fun after-school snack. They’re crowd-pleasers, no matter the setting.
- Crunchy, Cheesy Goodness: Each taquito is stuffed with juicy chicken, melty cheese, and a hint of spice, then baked or fried for ultimate crunch. They’re everything you want in a finger food.
- Customizable: Swap out fillings, play with toppings, or make them gluten-free—this recipe is as flexible as you need it to be.
What really sets my crispy chicken taquitos apart? It’s the technique. I brush each rolled taquito lightly with oil before baking, which gives you that classic “fried” crunch without a greasy mess. If you’re up for it, you can absolutely fry them, but honestly, the baked version is just as satisfying. Plus, using a blend of Monterey Jack and sharp cheddar cheese gives the filling an extra gooey stretch (the kind that makes people swoon). I’ve even snuck in a little cream cheese for richness, and it’s honestly a game-changer.
This isn’t just another taquito recipe—it’s the one that makes your picky eater ask for seconds and your friends beg for the secret. It’s comfort food, but with a creative twist that fits busy schedules and modern diets. These crispy chicken taquitos have become my go-to for making ordinary nights feel a little more festive. I hope they do the same for you!
What Ingredients You Will Need
This crispy chicken taquitos recipe keeps things simple but delivers big on flavor. Most of these ingredients are probably hanging out in your fridge or pantry already, and everything else is easy to find at any grocery store.
- For the Filling:
- Shredded chicken (2 cups / 250g) – Rotisserie chicken works perfectly, or use leftover roasted or poached chicken. I’ve even used grilled chicken in a pinch.
- Cream cheese (2 oz / 60g, softened) – Adds a creamy texture and helps bind the filling.
- Monterey Jack cheese (1 cup / 100g, shredded) – Melts beautifully and gives a mild, cheesy flavor.
- Sharp cheddar cheese (1/2 cup / 50g, shredded) – Adds a little tang and color.
- Green chilies (1 small can, 4 oz / 115g, drained) – Optional, but I love the mild heat and flavor boost. Substitute diced jalapeños for more kick or omit for a milder version.
- Garlic powder (1/2 tsp / 2g) – For a subtle savory note.
- Ground cumin (1/2 tsp / 2g) – Adds warmth; don’t skip this!
- Chili powder (1/2 tsp / 2g) – For a gentle smokiness. Use smoked paprika for a different twist.
- Salt & black pepper (to taste) – I usually start with 1/4 tsp salt and a few cracks of pepper.
- For Rolling:
- Corn tortillas (12 small, 5-6-inch / 13–15cm) – I recommend using a fresh, pliable brand like Mission or Guerrero. If you’re gluten-free, check the label.
- Vegetable oil (2–3 Tbsp / 30–45ml) – For brushing or frying. Olive oil works in a pinch but changes the flavor slightly.
- Optional Toppings & Sides:
- Shredded lettuce (crisp and fresh—my kids love the crunch)
- Pico de gallo or salsa (adds a burst of freshness)
- Sour cream or Greek yogurt (for dipping)
- Guacamole (because, why not?)
- Chopped cilantro, sliced jalapeños, or cotija cheese for garnish
Ingredient tips: If you only have flour tortillas, those will work, but they’ll be softer and less crisp. For dairy-free, use a plant-based cream cheese and cheese; I like the Daiya brand. Want to make them spicier? Add a dash of hot sauce or a sprinkle of chipotle powder to the filling. Seriously, don’t be afraid to play with the filling based on what you have—leftover turkey, ground beef, or even black beans all work great!
Equipment Needed
Making crispy chicken taquitos doesn’t require a fancy setup—just a few kitchen staples and a little creativity.
- Baking sheet – For baking the taquitos; opt for a heavy-duty rimmed one to prevent spills. If you’re frying, you’ll need a deep skillet or Dutch oven instead.
- Wire rack (optional) – Placing baked taquitos on a rack helps them stay crispy on all sides, but parchment or foil work too.
- Mixing bowl – For combining the chicken and cheese filling. I prefer a large glass bowl for easy cleanup.
- Measuring cups and spoons – Essential for accuracy. My favorite set is stainless steel—they last forever.
- Kitchen tongs – Useful for flipping taquitos if frying or moving them from the pan to the rack. A spatula works in a pinch.
- Pastry brush – For brushing oil on the tortillas before baking. If you don’t have one, use a folded paper towel dipped in oil.
- Microwave or skillet – For warming tortillas and making them pliable (a must to prevent cracking!).
- Paper towels – For draining after frying, or for blotting excess oil.
If you don’t have a wire rack, don’t sweat it—baking directly on parchment works just fine. For budget-friendly tools, check your local discount store or thrift shop. I’ve found some of my favorite baking sheets secondhand, and they still work like a charm. Just keep your tools dry and clean after use, especially if you fry—oil can gunk things up quickly!
How to Make Crispy Chicken Taquitos (Step-by-Step)
-
Preheat your oven or oil:
For baking, preheat your oven to 425°F (220°C). If frying, pour 1–1.5 inches (2.5–4cm) of oil into a deep skillet and heat to 350°F (175°C).
Tip: Use an oven thermometer or candy thermometer for accuracy—oil that’s too hot will burn the shells, too cool and they’ll be greasy. -
Prepare the filling:
In a large bowl, combine 2 cups (250g) shredded chicken, 2 oz (60g) cream cheese, 1 cup (100g) Monterey Jack cheese, 1/2 cup (50g) sharp cheddar, 1 can (4 oz/115g) green chilies, 1/2 tsp (2g) each garlic powder, cumin, and chili powder, plus salt and pepper to taste. Mix until everything is well blended and creamy.
If the filling seems dry, add a tablespoon (15ml) of sour cream or a splash of chicken broth. The mixture should be moist but not runny. -
Soften the tortillas:
Wrap the tortillas in a damp paper towel and microwave for 30 seconds, or warm briefly in a skillet. This will prevent cracking when you roll them.
Don’t skip this! Cold tortillas tear easily—I learned that the hard way. -
Fill and roll:
Spoon about 2 tablespoons (30g) of the chicken mixture onto the lower third of each tortilla. Roll up tightly and place seam-side down on the prepared baking sheet.
Don’t overfill or they’ll burst in the oven. If the tortillas start to crack, rewarm them. -
Brush with oil:
Lightly brush each taquito with oil (about 2–3 Tbsp / 30–45ml total). This ensures a crisp, golden finish. -
Bake or fry:
- To bake: Place in the preheated oven and bake for 15–18 minutes, or until crispy and golden brown. Flip halfway if you want even browning.
- To fry: Carefully add taquitos (3–4 at a time) to the hot oil. Fry for 2–3 minutes per side until deeply golden, then transfer to paper towels to drain.
Keep an eye on them—the difference between perfectly crisp and burnt is just a minute or two!
-
Serve:
Let taquitos cool for a minute, then serve immediately with your favorite toppings and dips.
If you’re making a big batch, keep finished taquitos warm in a 200°F (90°C) oven while you finish frying or baking the rest. Don’t stack them, or they’ll steam and lose their crunch—trust me, I’ve been there!
Cooking Tips & Techniques
- Don’t Skip Warming the Tortillas: Cold tortillas crack—I’ve had enough taquito blowouts to learn my lesson! Always warm them until pliable.
- Seal the Edges: If your tortillas are stubborn, you can “glue” the seam with a dab of cream cheese or a paste of flour and water.
- Oil is Your Friend: Whether baking or frying, oil helps achieve that signature crunch. Brush lightly for baking; don’t drown them or they’ll get soggy.
- Watch the Oven: Every oven is a little different. If your taquitos are browning too fast, lower the heat by 10–15 degrees. If they aren’t crisping, move them up a rack.
- Batch Cooking: If frying, don’t overcrowd the pan. Too many taquitos at once will drop the oil temp and give you greasy results. Work in small batches and reheat the oil between rounds.
- Make-Ahead Tip: The filling can be made up to two days ahead, and the rolled taquitos can be frozen before baking or frying. Bake straight from frozen, adding a couple extra minutes to the cook time.
- Troubleshooting: If your taquitos unroll, try securing with a toothpick (just remember to remove before serving!). For soggy taquitos, increase the oven temp or bake directly on a wire rack.
Honestly, the first time I made these, I crammed the tray too full—half my taquitos steamed instead of crisping. Now I always space them out, and it’s made all the difference. Cooking is all about learning from those little mishaps!
Variations & Adaptations
One of the best things about crispy chicken taquitos is how easy they are to customize. Here are some of my favorite twists and swaps:
- Spicy Buffalo Chicken Taquitos: Add 2 tablespoons (30ml) of buffalo sauce and a handful of blue cheese crumbles to the filling. Serve with ranch or blue cheese dip.
- Vegetarian Taquitos: Substitute black beans and corn (1 cup/175g each, drained) for the chicken. Add extra cumin and a little smoked paprika for flavor.
- Breakfast Taquitos: Use scrambled eggs, cooked breakfast sausage, and a sprinkle of pepper jack cheese. Perfect for busy mornings!
- Gluten-Free Option: Choose certified gluten-free corn tortillas, and double-check all seasonings for hidden gluten.
- Dairy-Free Adaptation: Use plant-based cream cheese and shredded cheese alternatives. I’ve had good luck with the Violife and Daiya brands.
- Air Fryer Method: Brush rolled taquitos with oil and cook in the air fryer at 400°F (200°C) for 8–10 minutes, flipping halfway. They get just as crisp!
My personal favorite? I sometimes add a spoonful of chipotle in adobo to the filling for a smoky, spicy kick. Don’t be afraid to experiment with whatever leftovers you have—pulled pork, taco meat, or even roasted veggies all make fantastic fillings. The possibilities are endless!
Serving & Storage Suggestions
For serving, I like to pile the crispy chicken taquitos high on a platter, sprinkle with chopped cilantro, and let everyone build their own plates. They’re best enjoyed fresh and hot, right out of the oven or fryer, but they’re also surprisingly delicious at room temperature (hello, picnic food).
Pair your taquitos with:
- Shredded lettuce, pico de gallo, and sliced avocados for freshness
- Sour cream or Greek yogurt for dipping
- Fresh lime wedges for a burst of citrus
- Mexican rice, refried beans, or a simple corn salad as sides
- Cold agua fresca or a classic margarita for the adults
To store leftovers, cool taquitos completely and refrigerate in an airtight container for up to 3 days. For longer storage, freeze cooked or uncooked taquitos in a single layer, then transfer to a freezer bag (up to 2 months).
Reheat in a 375°F (190°C) oven or air fryer until hot and crisp, about 8–10 minutes. The flavor develops even more overnight, making them a tasty lunchbox treat or quick snack. Honestly, I love sneaking a cold taquito straight from the fridge—no shame in that game!
Nutritional Information & Benefits
Each crispy chicken taquito (without toppings) contains approximately:
- Calories: 180
- Protein: 10g
- Carbohydrates: 14g
- Fat: 8g
- Fiber: 2g
Chicken is a lean protein source, helping you feel full and satisfied. Corn tortillas offer whole grain fiber, and using a mix of cheeses gives a dose of calcium. You can lighten things up by using Greek yogurt instead of sour cream for dipping, or reduce the cheese for a lower-fat version. For allergies, watch for dairy and gluten—easy to adapt with the suggestions above.
I love that this recipe balances comfort and nutrition. It’s hearty enough for a main meal but not too heavy, and it pairs beautifully with lots of veggies. A fun, family-friendly way to get everyone around the table!
Conclusion
If you’re looking for a dinner that’s both fun and absolutely delicious, these crispy chicken taquitos are the answer. They’re easy to make, endlessly customizable, and always a hit—trust me, I’ve never seen leftovers last longer than a day in my house! Whether you’re feeding a crowd or just want to spice up a weeknight, this recipe delivers on flavor, crunch, and pure dinner joy.
Don’t be afraid to tweak the fillings or toppings to match your cravings. That’s half the fun! Personally, I love how these taquitos can morph from a simple snack to an impressive party platter with just a few extra garnishes. Hope you’ll love them as much as my family does.
Give this crispy chicken taquitos recipe a try and let me know how it goes! Drop a comment below with your favorite flavor twist, or tag me with your creations. Happy crunching, and remember: dinner should always be this much fun!
Frequently Asked Questions
How do I keep my taquitos from unrolling while baking?
Place the taquitos seam-side down on the baking sheet, and roll them tightly. If needed, secure with a toothpick (just remember to remove before serving!).
Can I make crispy chicken taquitos ahead of time?
Yes! Prep and roll taquitos, then refrigerate up to 24 hours before baking or frying. You can also freeze them uncooked and bake straight from frozen—just add a few extra minutes to the cook time.
What’s the best way to reheat leftover taquitos?
Reheat in a 375°F (190°C) oven or air fryer for 8–10 minutes until hot and crispy. Avoid microwaving, as it makes them soggy.
Are these taquitos gluten-free?
They can be! Just use certified gluten-free corn tortillas and check that all your other ingredients are gluten-free.
Can I use flour tortillas instead of corn?
Yes, but flour tortillas will be softer and less crisp. They’re still tasty, though! For best results, bake or fry as directed and enjoy warm.
Pin This Recipe!
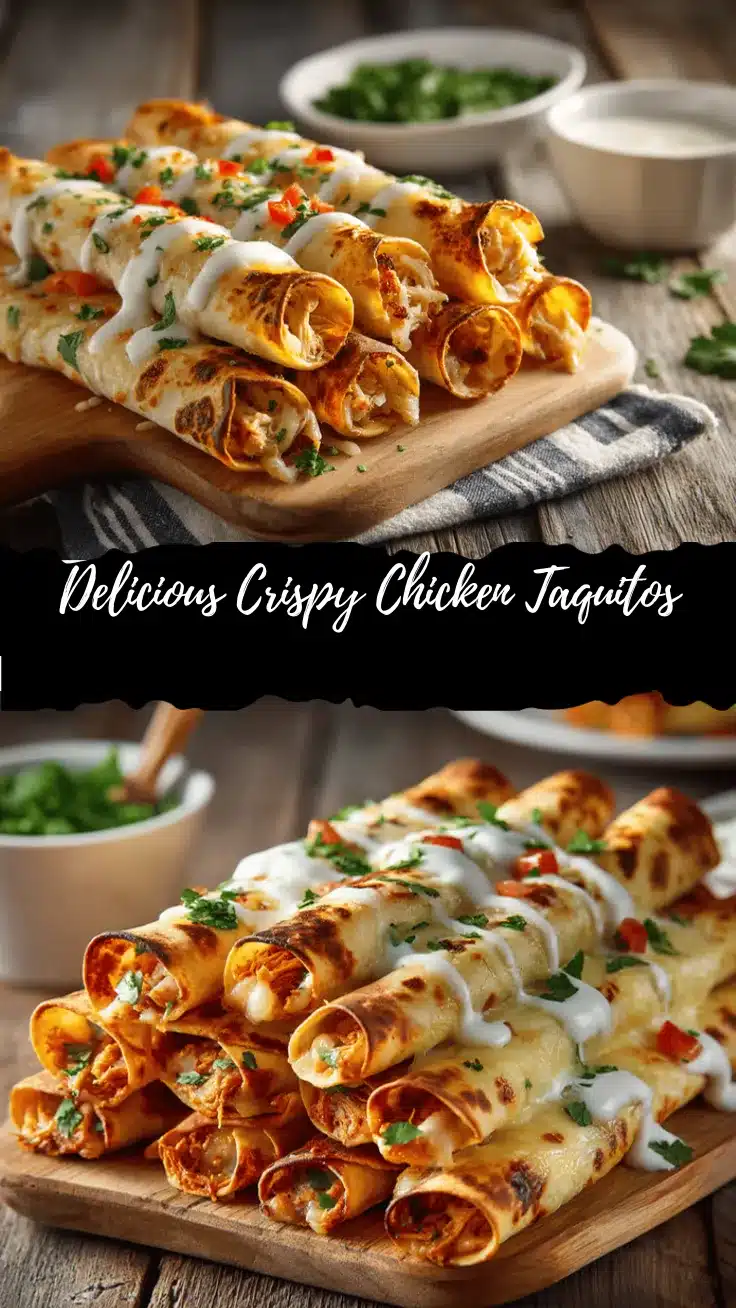

Crispy Chicken Taquitos
- Total Time: 30 minutes
- Yield: 12 taquitos (about 4 servings) 1x
Description
These crispy chicken taquitos are golden, crunchy, and bursting with cheesy, savory flavor. Perfect for a quick weeknight dinner or a fun appetizer, they’re easy to make and endlessly customizable for any occasion.
Ingredients
- 2 cups shredded chicken (rotisserie or cooked)
- 2 oz cream cheese, softened
- 1 cup Monterey Jack cheese, shredded
- 1/2 cup sharp cheddar cheese, shredded
- 1 small can (4 oz) green chilies, drained (optional)
- 1/2 tsp garlic powder
- 1/2 tsp ground cumin
- 1/2 tsp chili powder
- 1/4 tsp salt (or to taste)
- Black pepper, to taste
- 12 small corn tortillas (5–6 inch)
- 2–3 Tbsp vegetable oil (for brushing or frying)
- Optional toppings: shredded lettuce, pico de gallo or salsa, sour cream or Greek yogurt, guacamole, chopped cilantro, sliced jalapeños, cotija cheese
Instructions
- Preheat oven to 425°F (220°C) for baking, or heat 1–1.5 inches of oil in a deep skillet to 350°F (175°C) for frying.
- In a large bowl, mix shredded chicken, cream cheese, Monterey Jack cheese, cheddar cheese, green chilies, garlic powder, cumin, chili powder, salt, and pepper until well combined.
- Wrap tortillas in a damp paper towel and microwave for 30 seconds, or warm in a skillet until pliable.
- Spoon about 2 tablespoons of filling onto the lower third of each tortilla. Roll up tightly and place seam-side down on a baking sheet.
- Lightly brush each taquito with oil.
- To bake: Bake for 15–18 minutes until crispy and golden, flipping halfway if desired. To fry: Fry taquitos in batches for 2–3 minutes per side until golden, then drain on paper towels.
- Let taquitos cool for a minute, then serve immediately with your favorite toppings and dips.
Notes
Warm tortillas before rolling to prevent cracking. For extra crispiness, bake taquitos on a wire rack. Filling and rolled taquitos can be made ahead and frozen. Use gluten-free tortillas for a GF version. For dairy-free, substitute plant-based cheese and cream cheese. Air fryer method: cook at 400°F for 8–10 minutes, flipping halfway.
- Prep Time: 12 minutes
- Cook Time: 18 minutes
- Category: Main Course
- Cuisine: Mexican
Nutrition
- Serving Size: 1 taquito
- Calories: 180
- Sugar: 1
- Sodium: 320
- Fat: 8
- Saturated Fat: 3
- Carbohydrates: 14
- Fiber: 2
- Protein: 10
Keywords: chicken taquitos, crispy taquitos, baked taquitos, Mexican dinner, easy appetizer, family dinner, weeknight meal, gluten-free option