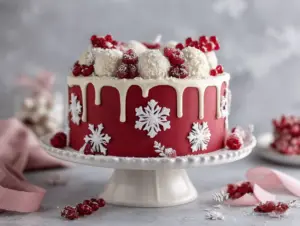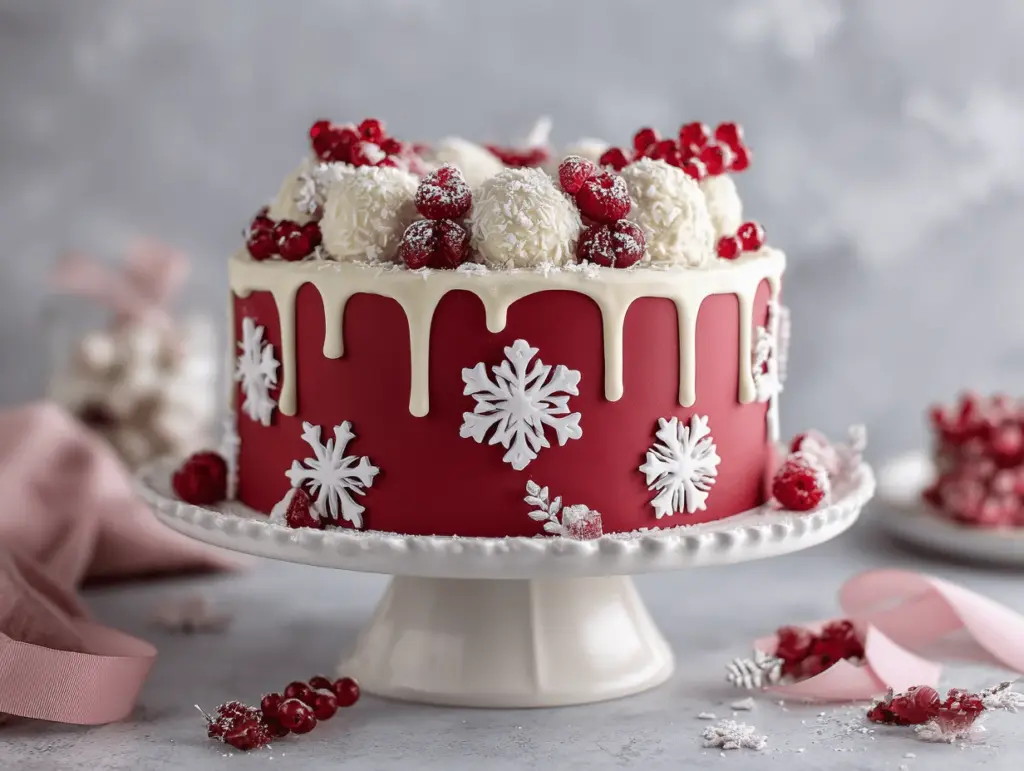
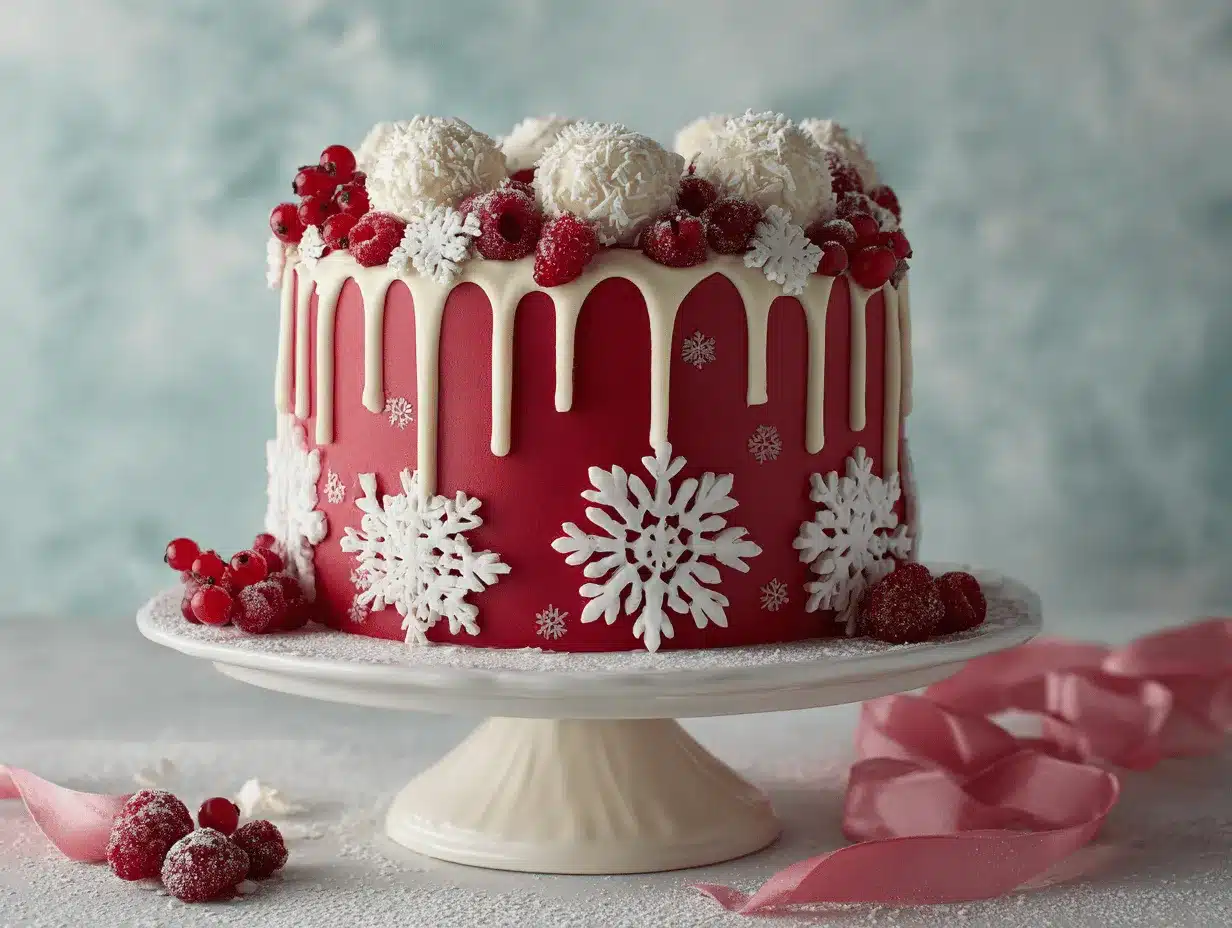
You know that magical moment when you walk into a holiday party and your eyes land on a Christmas themed cake so gorgeous, you almost don’t want to slice it? That’s the feeling I chase every December. For me, Christmas isn’t just about the gifts or the carols—it’s about the traditions we create around the table, and honestly, nothing sets the festive mood quite like a showstopping cake. I’ve baked my share of holiday desserts, from humble gingerbread loaves to towering red velvet masterpieces, but there’s something extra special about a cake that looks like Christmas itself.
I first started experimenting with Christmas themed cake designs when my kids begged for a “Santa cake” instead of our usual cookies. That little experiment turned into a yearly tradition—each year, I push myself to craft a new festive creation, and every year the bar gets higher! Whether you’re planning a cozy family dinner, a lively office party, or just want to wow your friends on Instagram or Pinterest, these cake designs are guaranteed to impress. From classic snowy landscapes to whimsical candy cane layers, there’s a style here for everyone. Plus, you don’t need to be a professional baker—some of my favorite designs are surprisingly simple but look like you spent hours in the kitchen. After baking (and eating!) my way through countless trial-and-error sessions, I’m excited to share the best Christmas themed cake designs that have truly made my holidays unforgettable. So, grab your apron, gather your sprinkles, and let’s make this Christmas the most deliciously beautiful one yet!
Why You’ll Love These Christmas Themed Cake Designs
- Instant Festive Wow-Factor: These cakes steal the show at any holiday gathering. Trust me, you’ll see cameras come out before the first slice is cut!
- Perfect for All Skill Levels: Whether you’re a beginner or a seasoned baker, there’s a Christmas themed cake design here for you. I’ve included ideas that don’t require fancy tools or advanced decorating skills.
- Endless Creativity: You can customize flavors, colors, and decorations to match your holiday theme or family favorites. I love how each cake becomes a canvas for your own festive flair.
- Kid-Approved Fun: My kids are obsessed with helping out, especially with the frosting and sprinkles. These cakes are a fantastic way to make sweet holiday memories together.
- Pinterest-Perfect: Looking for something that’ll get shared, pinned, and loved? These cakes are designed to be as photogenic as they are delicious.
- Memorable Centerpiece: Forget plain desserts—these cakes double as stunning table décor. They spark conversation and make your party feel extra special.
- Scalable for Any Party: Hosting a crowd or just a few? You can easily adjust the size or number of layers for any occasion.
What sets these designs apart from the rest? It’s that extra attention to detail—like edible gold leaf, sparkly sugars, or using fresh rosemary for a “pine branch” effect—that really makes each cake feel magical. I’ve learned over the years that even the simplest cakes can look absolutely stunning with a little creativity and the right finishing touches. Plus, these cakes are more than just eye-candy—they taste incredible, too. The best part? You don’t need a culinary degree or a million gadgets. With my tested shortcuts and honest tips, you’ll be whipping up cakes that look bakery-worthy in no time. So whether you’re looking to impress your in-laws, delight your kids, or just treat yourself, these Christmas themed cake designs are your ticket to a truly memorable holiday table.
What Ingredients You Will Need
This roundup of Christmas themed cake designs covers a range of styles and flavors, but most rely on a few easy-to-find ingredients. Here’s what you’ll want to have on hand to create cakes that taste as good as they look:
- For the Cake Base:
- All-purpose flour (or gluten-free blend for allergy-friendly cakes)
- Granulated sugar (you can sub coconut sugar for a caramel-y flavor)
- Unsalted butter, softened (or dairy-free margarine if needed)
- Eggs, room temperature (for structure and richness)
- Baking powder and baking soda (for lift and tenderness)
- Salt (a little goes a long way in balancing sweetness)
- Whole milk or buttermilk (dairy-free alternatives work, too)
- Vanilla extract (I like Nielsen-Massey for a bold flavor)
- Optional: cocoa powder (for chocolate cakes), cinnamon, nutmeg, ginger (for spice cakes), or almond extract for a nutty twist
- For Frostings and Fillings:
- Powdered sugar (for smooth buttercream or cream cheese frostings)
- Cream cheese, softened (for tangy frosting)
- Heavy cream (for whipped frostings and ganache)
- High-quality chocolate (bars or chips—Ghirardelli is my go-to for ganache or drips)
- Food coloring gels (red, green, gold, and silver are classics for Christmas themed cake designs)
- Butter (again, for richness in frostings—use high-fat European butter for extra creaminess!)
- Flavorings: peppermint extract (for candy cane cakes), orange zest, lemon extract, or even instant espresso powder for mocha cakes
- Decorations & Toppings:
- Sprinkles (holiday mixes with red, green, and white add instant festivity)
- Edible glitter or gold leaf (for a touch of glam—just a little makes the design pop!)
- Mini candy canes or peppermint candies
- Fresh cranberries (tossed in sugar for a frosted look)
- Marzipan or fondant (for shaping little trees, snowmen, or ribbon bows)
- Fresh herbs like rosemary (they look just like mini pine branches—seriously, it’s a game changer!)
- Crushed cookies (think Oreos for “soil” or shortbread for “snow”)
- Assorted nuts, dried fruit, or chocolate curls for garnishing
You can absolutely adjust these to suit dietary needs! For gluten-free cakes, swap the all-purpose flour for a 1:1 blend and check that your baking powder is GF. Dairy-free? Use plant-based butters and milks. To make vegan cakes, flax eggs (1 tablespoon ground flax + 2.5 tablespoons water per egg) work surprisingly well. And don’t sweat it if you’re missing a specific decoration—sometimes, a simple dusting of powdered sugar makes the prettiest “snow.”
When I want to wow with minimal effort, I grab a boxed cake mix and focus on creative decorating. No shame in shortcuts, especially during the holiday rush! The real magic is in how you finish the cake—so grab your favorite ingredients and let’s start building some Christmas cheer, one layer at a time.
Equipment Needed
Every Christmas themed cake design starts with the right tools. Here’s what I reach for (and what I’ve learned you can skip or substitute):
- Mixing Bowls: At least two—one for wet ingredients, one for dry. Glass or stainless steel are easiest to clean.
- Electric Mixer or Stand Mixer: A hand mixer works great for most cakes, but a stand mixer is a lifesaver for big batches and fluffy frostings.
- Cake Pans: 8-inch or 9-inch round pans are most common. You can use square or loaf pans for alternative designs—just adjust your baking time. I’ve even used disposable foil pans in a pinch (no judgment!).
- Offset Spatula: Makes spreading frosting way easier, but a butter knife will do in a pinch.
- Parchment Paper: For lining pans—nothing ruins a cake like sticking to the bottom!
- Cooling Racks: Essential for even cooling. If you don’t have one, turn a baking sheet upside down and rest your cakes on that.
- Cake Turntable (Optional): Not required, but decorating is so much smoother with one. I grabbed mine for under $20.
- Piping Bags & Tips: Use for decorative details. You can also use a zip-top bag with the corner snipped off for quick piping.
- Bench Scraper or Icing Smoother: For those crisp sides and smooth finishes—plastic or metal both work.
- Serrated Knife: For leveling cake layers and getting clean slices.
My top tip? If you’re just starting out, don’t stress about having every gadget. I’ve decorated beautiful cakes with just a butter knife and some parchment paper. For specialty items like gold leaf tweezers or impression mats, check your local craft store or borrow from a friend. And always wash your piping tips right after use—the frosting dries fast and gets stubborn! Budget-friendly tools (like reusable piping bags) can make the process smoother without breaking the bank.
Preparation Method
Ready to bring your favorite Christmas themed cake design to life? Here’s a step-by-step method for a classic snowy winter cake—adaptable for nearly all the ideas featured below. Total prep and bake time is about 2 ½ to 3 hours, depending on your design and details.
-
Preheat and Prepare (10 minutes):
Preheat your oven to 350°F (175°C). Grease two 8-inch (20cm) round cake pans and line the bottoms with parchment paper. This step saves you from any cake-sticking disasters! -
Mix the Cake Batter (15 minutes):
In a large bowl, whisk together 2 ½ cups (315g) all-purpose flour, 2 teaspoons baking powder, ½ teaspoon baking soda, and ½ teaspoon salt.
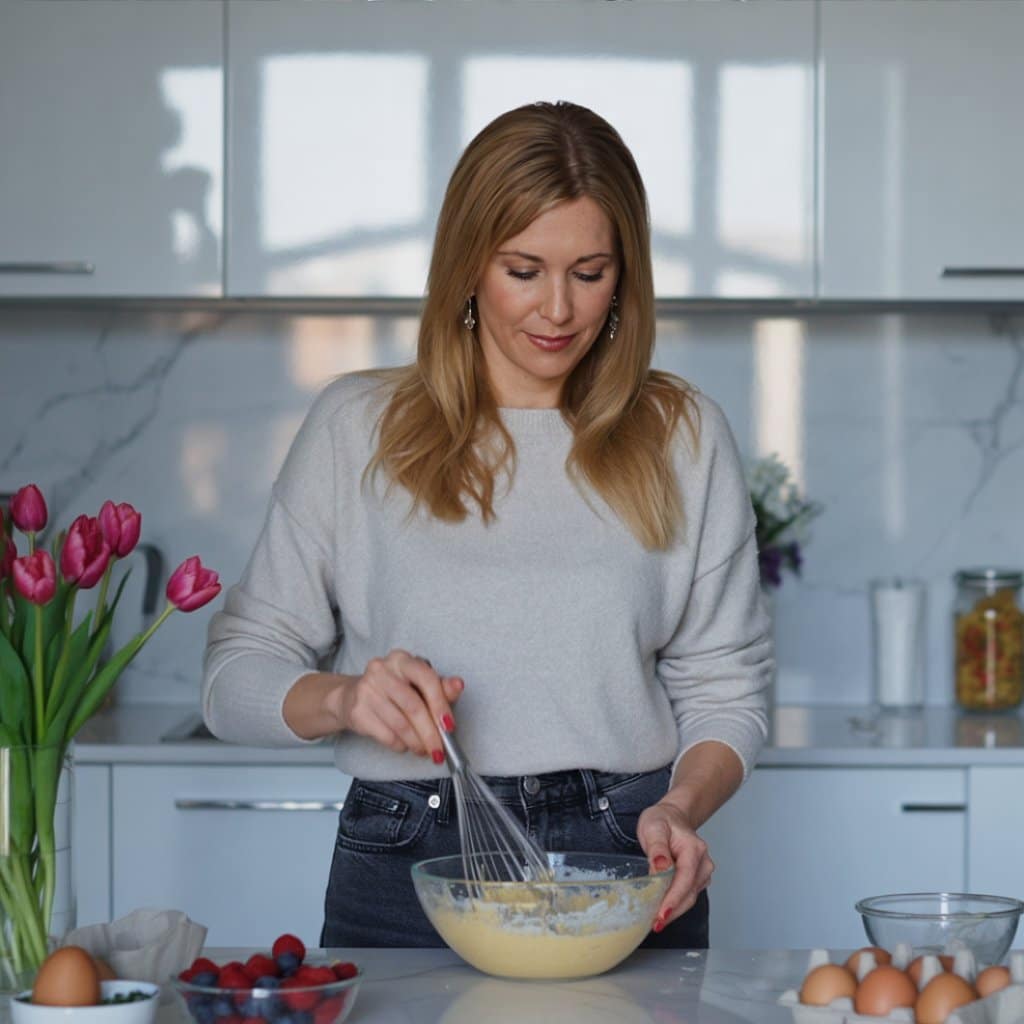
In a separate bowl, cream 1 cup (226g) unsalted butter with 2 cups (400g) granulated sugar until fluffy (about 3 minutes with a mixer).
Add 4 large eggs, one at a time, mixing well after each. Stir in 1 tablespoon vanilla extract.
Alternately add your dry ingredients and 1 cup (240ml) whole milk, beginning and ending with dry. Mix until just combined—overmixing makes cakes tough! -
Bake (25-35 minutes):
Divide the batter evenly between pans. Bake for 25–35 minutes, or until a toothpick comes out clean from the center. Cakes should be lightly golden and spring back when pressed.
If one layer bakes faster, remove it so it doesn’t dry out. -
Cool Completely (30-60 minutes):
Let cakes cool in pans for 10 minutes, then run a knife around the edge and turn onto racks. Cool fully before frosting—warm cakes will melt your decorations (and trust me, I’ve learned this the hard way!). -
Prepare Frosting (10-15 minutes):
For a classic buttercream: Beat 1 cup (226g) unsalted butter until creamy. Gradually add 4 cups (480g) powdered sugar, then 1–2 tablespoons (15–30ml) milk or cream and 2 teaspoons vanilla. Whip until fluffy.
For color, add gel food coloring to match your design. -
Level and Fill (10 minutes):
If needed, trim domed tops with a serrated knife. Place one layer on your serving plate. Spread a generous layer of frosting, then top with the second cake. -
Crumb Coat (10 minutes):
Apply a thin layer of frosting around the cake to seal in crumbs. Chill for 20 minutes—this makes the final coat super smooth. -
Final Frosting and Decoration (20–60 minutes):
Frost the cake with your main color. Use a piping bag for decorative swirls, rosettes, or borders. Add sprinkles, candies, or edible glitter.
For a snow effect, sift powdered sugar over the top. For trees, use green-tinted frosting piped with a star tip. Place sugared cranberries or rosemary “branches” for accents. -
Chill and Serve:
Refrigerate for at least 30 minutes before slicing for neat pieces. Store leftovers covered in the fridge.
Personal note: Don’t rush the cooling or chilling steps—patience pays off with beautiful, sturdy cakes that don’t smudge or sag. If you want to prep ahead, bake and freeze cake layers, then assemble and decorate the day of your party. Relax and have fun with it, even if your trees lean a little or your snow drifts go wild—that’s part of the charm!
Cooking Tips & Techniques
Over the years, I’ve picked up some tricks that make Christmas themed cake designs turn out picture-perfect (and stress-free):
- Room Temperature Ingredients: Cakes mix up fluffier and frostings whip up smoother when your butter, eggs, and dairy aren’t cold. I set mine out an hour ahead (or gently warm butter in the microwave for a few seconds—just don’t melt it!).
- Chill Between Steps: If your frosting gets soft or your cake starts to droop, pop everything in the fridge for 10–15 minutes. This is especially helpful with elaborate decorations or if your kitchen is warm.
- Preventing Dry Cake: Don’t overbake! Check for doneness early, and remember cakes keep cooking a little after coming out of the oven. If you’re worried, brush layers with a little simple syrup for extra moisture.
- Smooth Frosting Hack: Dip your spatula in hot water, shake off the excess, and then smooth the frosting. Works better than any fancy tool, I promise!
- Piping Like a Pro: Practice your designs on parchment first. If you mess up on the cake, gently scrape off the frosting and start again. No one will ever know.
- Coloring Frosting: Use gel food colors—they’re more vibrant and won’t thin your buttercream. Start with a little and build up to your desired shade.
- Handling Fondant: Dust your hands and rolling pin with powdered sugar to prevent sticking. If fondant cracks, knead in a drop of shortening to bring it back to life.
One year, I tried to rush by skipping the crumb coat—big mistake! The final frosting was full of crumbs. So, always take that extra step, especially with dark or red velvet cakes. Multitasking tip: bake cake layers a day in advance, wrap tightly, and chill. This not only saves time but makes the cake easier to frost and decorate. And if you’re ever in doubt, keep some extra decorations handy—sprinkles or sugared cranberries hide a multitude of imperfections! The best cakes are the ones that tell a story, even if they’re a little wonky around the edges.
Variations & Adaptations
There’s no single “right” way to create a Christmas themed cake design. Here are a few of my favorite twists (and ways to make your cake fit any crowd):
- Dietary Options:
- For gluten-free guests, use a trusted 1:1 gluten-free flour blend. Double-check that your baking powder and decorations are gluten-free, too.
- Vegan cake? Swap eggs for flax eggs and use plant-based butter and milk. Vegan buttercream is surprisingly delicious—just use a good vegan stick margarine.
- If you’re baking for nut allergies, skip almond extracts and avoid nut-based decorations.
- Flavor Twists:
- Spice it up with gingerbread or chai-inspired layers. Add molasses, cinnamon, and ginger for a cozy taste.
- Chocolate peppermint is always a hit—use peppermint extract in your cake and frosting, and decorate with crushed candy canes.
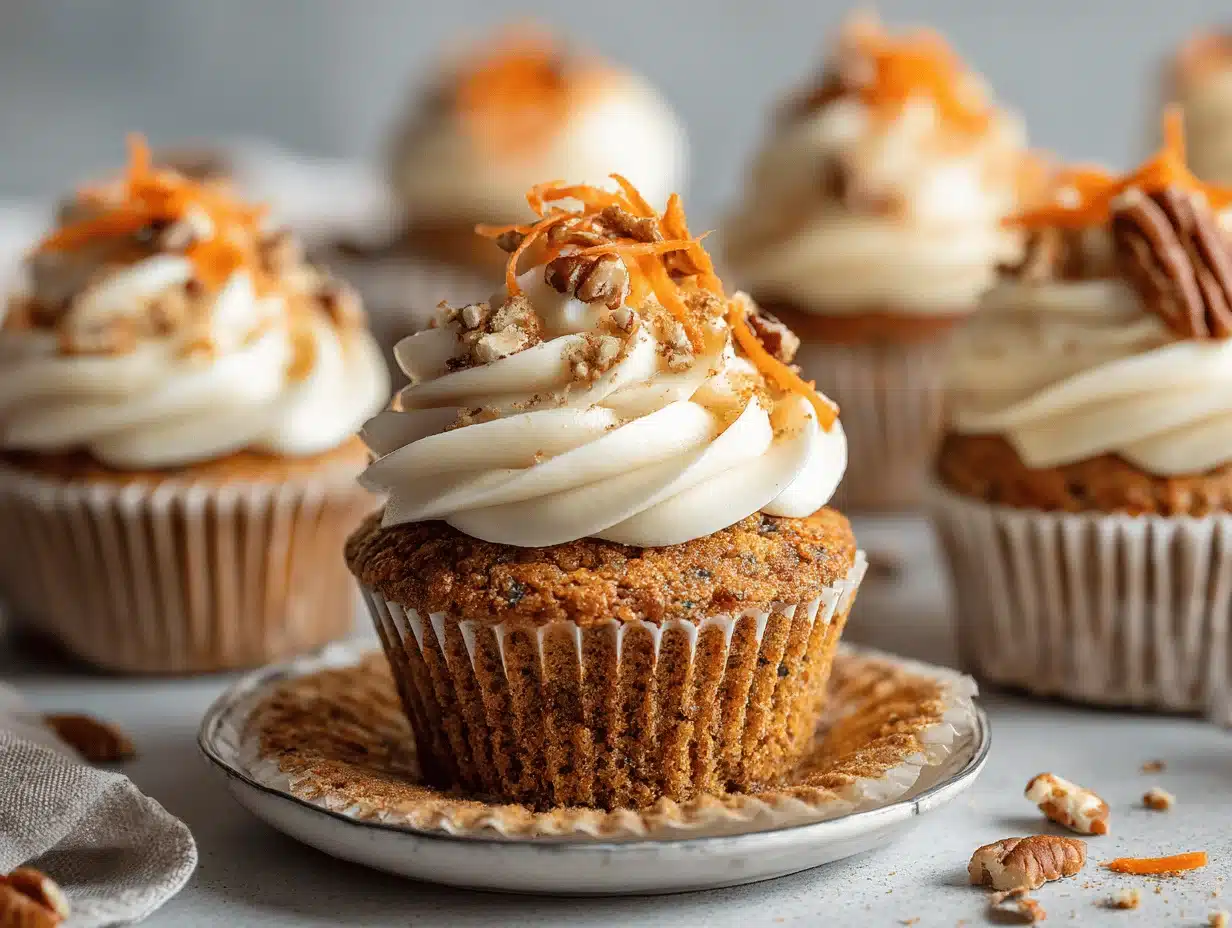
- For a light, fruity twist, try orange zest and dried cranberries in the batter, then frost with a tangy cream cheese icing.
- Design Variations:
- No time for a layer cake? Make a sheet cake, then decorate the top with piped trees, snowflakes, or a Santa belt design.
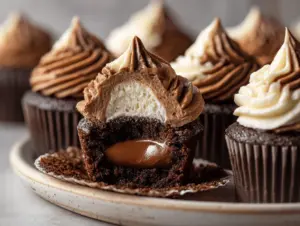
- Cupcakes can be arranged in a tree or wreath shape on a platter—perfect for parties where guests want to grab and go.
- Try a naked cake look by leaving the sides lightly frosted and layering with fresh berries and rosemary sprigs for a rustic vibe.
Last Christmas, I made mini “gift box” cakes by cutting a sheet cake into squares and icing each one with a different color and design—huge hit at the cookie exchange! Don’t be afraid to play around with colors, flavors, and shapes. The holidays are about joy and creativity, so let your cake reflect your own festive spirit.
Serving & Storage Suggestions
Presentation is half the fun with Christmas themed cake designs! Serve your cake at room temperature for the best flavor and texture—just take it out of the fridge about 30 minutes before slicing. For a showstopping centerpiece, place your cake on a cake stand and surround it with sugared cranberries, rosemary sprigs, or mini ornaments (just make sure those are non-edible!).
Pair your cake with hot cocoa, spiced tea, or a glass of bubbly for grown-up celebrations. I love serving a slice alongside fresh berries or a dollop of whipped cream. If you’re making cupcakes or mini cakes, arrange them in fun shapes like trees or wreaths for easy, shareable treats.
Storing leftovers is easy: cover the cake tightly with plastic wrap or store in an airtight container in the fridge for up to 5 days. Unfrosted cake layers freeze beautifully—wrap in plastic and foil, then freeze for up to 2 months. Thaw at room temperature before assembling or serving. For frosted cakes, freeze slices on a baking sheet, then wrap individually. Reheat gently (if desired) or let come to room temp for best results. Honestly, the flavors often intensify after a day or two—if you can manage to save any!
Nutritional Information & Benefits
Here’s a quick look at the nutrition basics for most classic Christmas themed cake designs (per slice, based on a standard 8-inch two-layer cake):
- Calories: 350–500 (depending on frosting and add-ins)
- Fat: 15–25g
- Carbs: 50–70g
- Protein: 3–6g
While these cakes are definitely a treat, you can boost the benefits with smart swaps—whole grain flour for fiber, Greek yogurt for protein, or fresh fruit for natural sweetness. Key ingredients like eggs provide B vitamins, while nuts and dried fruit (if used) offer healthy fats and antioxidants. Most cakes contain gluten, dairy, and eggs, but you can easily adapt for allergies. My personal approach? Holiday desserts are about joy—so I savor every festive bite, then share the leftovers with friends and family to spread the cheer!
Conclusion
If you’ve ever wanted to create a Christmas themed cake design that people talk about long after the party’s over, this is your year. These ideas bring the magic of the season right to your table—without the stress or need for a pastry chef’s toolbox. Whether you’re baking for a crowd, your kids, or just your own holiday spirit, there’s something here to make your celebrations sweeter and brighter.
Don’t be afraid to put your own spin on these cakes—change up the colors, swap flavors, or add a personal touch that makes your cake uniquely yours. The best holiday desserts are the ones that come from the heart (and, honestly, a little bit of frosting on your shirt is just part of the process!).
I love these Christmas themed cake designs because they’ve turned my holiday gatherings into joyful, creative events—and I hope they do the same for you. If you try any of these ideas, let me know how it goes! Share your creations, drop a comment, or tag me on Pinterest. Happy baking, and may your season be as sweet as your cake!
FAQs
How do I get bright red and green frosting for my Christmas themed cake designs?
Use gel food coloring instead of liquid. Start with a small amount and let the color develop—sometimes, reds and greens deepen as they sit. For super vibrant colors, use a white buttercream base.
Can I make these cakes ahead of time?
Absolutely! Bake cake layers in advance, wrap tightly, and store in the fridge up to 2 days or freeze for up to 2 months. Decorate the day you plan to serve for the freshest look.
What’s the easiest Christmas themed cake design for beginners?
A snowy sheet cake! Just frost with white icing, add a sprinkle of coconut or powdered sugar, and decorate with candy trees or sprinkles. No fancy piping needed.
How do I prevent my cake from drying out?
Don’t overbake, and always store your cake covered. Brushing layers with simple syrup before frosting also keeps cakes extra moist.
Can I use store-bought cake mix and still make it look festive?
Definitely! Use a boxed mix for the cake, then focus on creative decorations—colored frosting, holiday candies, and sprinkles turn any cake into a Christmas showstopper.
Pin This Recipe!
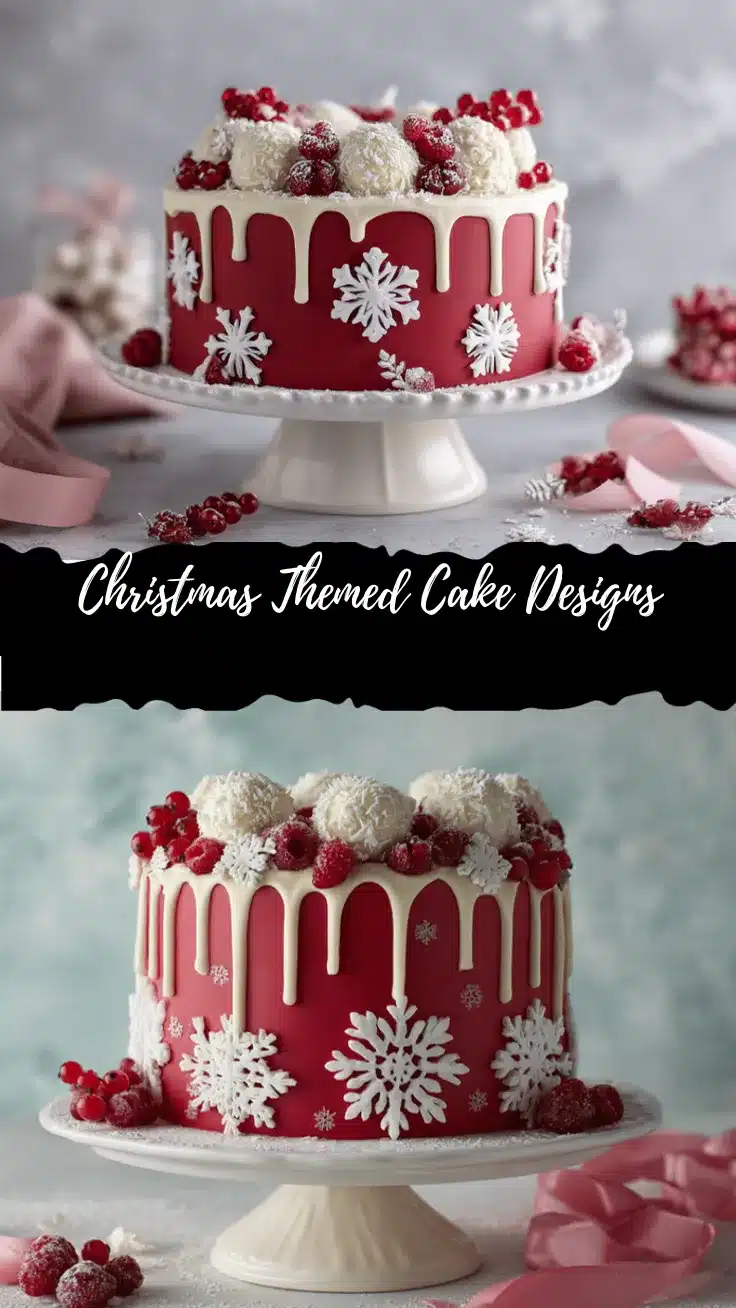

Christmas Themed Cake Designs
- Total Time: 2 hours 30 minutes
- Yield: 12 servings 1x
Description
These Christmas themed cake designs are showstopping, festive cakes perfect for holiday parties and gatherings. With customizable flavors and decorations, they’re designed to impress guests of all ages while being approachable for bakers of any skill level.
Ingredients
- 2 1/2 cups all-purpose flour (or gluten-free blend)
- 2 cups granulated sugar (or coconut sugar)
- 1 cup unsalted butter, softened (or dairy-free margarine)
- 4 large eggs, room temperature
- 2 teaspoons baking powder
- 1/2 teaspoon baking soda
- 1/2 teaspoon salt
- 1 cup whole milk or buttermilk (or dairy-free alternative)
- 1 tablespoon vanilla extract
- Optional: 1/2 cup cocoa powder (for chocolate cakes)
- Optional: 1 teaspoon cinnamon, 1/2 teaspoon nutmeg, 1/2 teaspoon ginger (for spice cakes)
- Optional: 1 teaspoon almond extract
- 4 cups powdered sugar (for frosting)
- 8 ounces cream cheese, softened (for cream cheese frosting, optional)
- 1–2 tablespoons heavy cream or milk (for frosting)
- High-quality chocolate (bars or chips, for ganache or drips)
- Food coloring gels (red, green, gold, silver)
- Butter (for frosting)
- Peppermint extract, orange zest, lemon extract, or instant espresso powder (for flavor variations)
- Sprinkles (holiday mixes)
- Edible glitter or gold leaf
- Mini candy canes or peppermint candies
- Fresh cranberries (tossed in sugar)
- Marzipan or fondant
- Fresh rosemary
- Crushed cookies (Oreos or shortbread)
- Assorted nuts, dried fruit, or chocolate curls
Instructions
- Preheat oven to 350°F (175°C). Grease two 8-inch round cake pans and line with parchment paper.
- In a large bowl, whisk together flour, baking powder, baking soda, and salt.
- In a separate bowl, cream butter and sugar until fluffy (about 3 minutes).
- Add eggs one at a time, mixing well after each. Stir in vanilla extract.
- Alternately add dry ingredients and milk, beginning and ending with dry. Mix until just combined.
- Divide batter evenly between pans. Bake for 25–35 minutes, or until a toothpick comes out clean.
- Let cakes cool in pans for 10 minutes, then turn onto racks to cool completely.
- For buttercream: Beat butter until creamy. Gradually add powdered sugar, then milk or cream and vanilla. Whip until fluffy. Add gel food coloring as desired.
- If needed, level cake layers with a serrated knife. Place one layer on serving plate, spread frosting, and top with second layer.
- Apply a thin crumb coat of frosting and chill for 20 minutes.
- Frost cake with main color. Decorate with piping, sprinkles, candies, edible glitter, and other toppings as desired.
- Refrigerate for at least 30 minutes before slicing. Store leftovers covered in the fridge.
Notes
For gluten-free or vegan adaptations, use a 1:1 gluten-free flour blend and flax eggs or plant-based dairy. Chill cakes and frosting between steps for best results. Practice piping on parchment before decorating the cake. Use gel food coloring for vibrant colors. Cakes can be made ahead and frozen. Decorate with creativity—simple powdered sugar can look like snow.
- Prep Time: 45 minutes
- Cook Time: 35 minutes
- Category: Dessert
- Cuisine: American
Nutrition
- Serving Size: 1 slice (1/12 of a two-layer 8-inch cake)
- Calories: 425
- Sugar: 40
- Sodium: 250
- Fat: 20
- Saturated Fat: 12
- Carbohydrates: 60
- Fiber: 1
- Protein: 4
Keywords: Christmas cake, holiday cake, festive cake, Christmas dessert, cake decorating, buttercream, holiday baking, Christmas party, winter cake, themed cake, easy Christmas cake, Christmas cake ideas, Christmas cake designs, Christmas recipes, Christmas sweets