The first time I saw a peppermint hot cocoa bomb melt into steamy milk, I felt like a kid watching a magic trick. The chocolate shell dissolves, marshmallows pop to the surface, and suddenly, you’ve got a mug of the coziest, mintiest hot chocolate imaginable. It’s the kind of winter delight that makes you want to wrap up in a blanket, put on a cheesy holiday movie, and forget the world for a little while.
I stumbled onto the peppermint hot cocoa bomb cup trend during one of those late-night Pinterest scrolls (you know how it is). I’d been searching for a holiday treat that was as fun to make as it was to drink. The peppermint twist – crunchy candy canes, creamy chocolate, and a burst of cool mint – sealed the deal for me. These cocoa bomb cups are a little different from the classic spheres: they’re easier to assemble, just as impressive, and way less likely to roll off the counter (learned that the hard way!).
What I love most? These peppermint hot cocoa bomb cups make the cutest gifts and party favors – plus, you can whip up a batch even if you don’t have fancy molds or endless patience. They’re perfect for cozying up with family, surprising the kids after a snowball fight, or adding a festive sparkle to your holiday table. Honestly, after testing and tweaking this recipe over a dozen times, I’m convinced there’s nothing more joyful than watching someone’s eyes light up as the chocolate “bomb” reveals its sweet surprise. If you’re looking for a holiday treat that’s equal parts show-stopper and comfort-in-a-cup, you’ve found it.
Why You’ll Love This Peppermint Hot Cocoa Bomb Cups Recipe
After plenty of kitchen experiments (and more than a few “taste tests”), I have to say: these peppermint hot cocoa bomb cups are a total holiday game-changer. Here’s why they’re such a hit in my house—and why I think you’ll adore them too:
- Quick & Easy: You only need about 30 minutes from start to finish. No marathon baking session required, so you can fit them in even on busy December days.
- Simple Ingredients: Everything you need can be found at your local supermarket—or, honestly, probably in your pantry right now. No need to hunt down obscure candies or specialty chocolate.
- Perfect for Gifting & Gatherings: These cups look adorable wrapped up in a cellophane bag with a ribbon, or lined up on a holiday dessert tray. They’re the ultimate last-minute gift or party treat.
- Crowd-Pleaser: Every time I serve these, both the kids and adults can’t help but “ooh” and “ahh.” There’s just something magical about watching the marshmallows pop out!
- Unbelievably Delicious: The rich chocolate, the refreshing peppermint, that creamy, dreamy hot cocoa—this is pure comfort in a cup. The crunchy peppermint bits on top add that perfect festive flair.
What really sets this recipe apart is the form factor: making the bombs as “cups” instead of spheres means they’re less fussy to make but still deliver that same wow factor. I use a classic chocolate-candy melt method for the shells, and I always blend up my own peppermint cocoa mix for a deeper, more balanced flavor. Plus, there’s a trick for sealing the cups with a swirl of melted chocolate, so everything stays tidy and delicious until you’re ready to drop one in your mug. It’s the kind of treat that makes you feel like a holiday hero with zero stress—and let’s face it, we could all use a little more of that this season. Once you’ve tried these, you might just find yourself making “just one more batch” (trust me, it happens!).
What Ingredients You Will Need
This recipe uses simple, festive ingredients to create that signature peppermint-chocolate holiday flavor. Most are pantry staples, and you can easily swap things to suit your taste or dietary needs.
- For the Chocolate Shells:
- 12 oz (340 g) semisweet or dark chocolate chips (use high-quality for best flavor—Ghirardelli or Guittard work great)
- 1 tsp coconut oil or vegetable shortening (optional, helps the chocolate melt smoothly)
- For the Peppermint Cocoa Mix:
- 3/4 cup (90 g) unsweetened cocoa powder
- 1 cup (200 g) granulated sugar (or substitute coconut sugar for a natural touch)
- 1/2 cup (60 g) powdered milk or dairy-free milk powder (this makes the cocoa creamy—omit for a dairy-free version)
- 1/4 tsp salt
- 1/2 tsp peppermint extract (I like McCormick, but any pure extract works)
- Fillings & Toppings:
- 1/2 cup (30 g) mini marshmallows (freeze-dried work well too)
- 1/4 cup (30 g) crushed peppermint candies or candy canes (crush them in a zip-top bag for less mess)
- Optional: sprinkles, extra chocolate drizzle, or colored sugar for extra pizazz
Ingredient Tips: If you’re making these for a gluten-free crowd, double-check your cocoa and peppermint candies for hidden gluten. For vegan or dairy-free options, use allergy-friendly chocolate chips and coconut milk powder. You can swap the peppermint extract for orange or almond for a different holiday twist. And if you like things extra-chocolatey, go for a mix of milk and dark chocolate chips for the shells.
Equipment Needed
- Silicone Muffin Cups or Cupcake Pan: Silicone is my favorite (easy to peel off), but you can also use a standard muffin tin lined with sturdy paper liners.
- Small Microwave-Safe Bowl: For melting chocolate. Glass works best since it holds heat evenly.
- Spoon or Pastry Brush: To “paint” the chocolate up the sides of the cups—either works, but a brush gives a smoother finish.
- Measuring Cups & Spoons: For getting the cocoa mix just right.
- Zip-Top Bag & Rolling Pin: For crushing peppermint candies (I’ve used a heavy mug in a pinch—just don’t whack too hard!).
- Baking Sheet: For transferring cups to and from the fridge or freezer.
No fancy molds required—one of the best parts! If you only have paper liners, chill the chocolate a bit longer before removing. For easy cleanup, line your baking sheet with parchment paper. And if you use your silicone cups for other treats, give them a rinse in warm, soapy water to keep them looking new. Budget tip: I grabbed my silicone muffin cups from the dollar store and they’ve lasted me years.
How to Make Peppermint Hot Cocoa Bomb Cups

- Melt the Chocolate: Place 12 oz (340 g) chocolate chips and 1 tsp coconut oil in a microwave-safe bowl. Microwave in 20-second bursts, stirring after each, until smooth (about 1–2 minutes total). Don’t overheat—if it looks glossy and stirs easily, it’s ready.
- Form the Chocolate Cups: Spoon about 1 tablespoon (15 ml) melted chocolate into each silicone muffin cup (you’ll need 12). Use the back of a spoon or a pastry brush to coat the bottom and sides evenly. Chill in the fridge for 10 minutes, then add a second coat if the chocolate looks thin. Chill again until completely set (another 10–15 minutes).
- Mix the Peppermint Cocoa: In a medium bowl, whisk together 3/4 cup (90 g) cocoa powder, 1 cup (200 g) sugar, 1/2 cup (60 g) powdered milk, 1/4 tsp salt, and 1/2 tsp peppermint extract. Taste and adjust the peppermint if you like it extra-minty.
- Fill the Cups: Once shells are set, carefully peel them from the silicone molds. Spoon 2 tablespoons (about 20 g) cocoa mix into each cup, then top with 6–8 mini marshmallows and a generous sprinkle of crushed peppermint candy (about 1 tsp per cup). Don’t overfill—leave a bit of space at the top.
- Seal the Bomb Cups: Re-melt any leftover chocolate (about 1/2 cup/85 g). Spoon a little over the filled cups, smoothing it with the back of a spoon to completely cover the filling. Quickly sprinkle more crushed peppermint or festive sprinkles on top before the chocolate sets.
- Chill and Set: Place the finished cups on a lined baking sheet and refrigerate for at least 15 minutes, or until fully hardened.
- Serve: To enjoy, place a bomb cup in a large mug. Pour 8–10 oz (240–300 ml) steaming hot milk over the top. Watch it melt and stir until smooth and creamy. Enjoy right away!
Troubleshooting: If your chocolate shells crack, try letting them warm up for a minute before peeling. If melted chocolate gets too thick, add a tiny bit more coconut oil. And if you’re short on time, freeze the shells for 5–7 minutes instead of chilling in the fridge.
Cooking Tips & Techniques for Peppermint Hot Cocoa Bomb Cups
Making peppermint hot cocoa bomb cups is surprisingly forgiving, but a few pro tips can help you nail it every time. Here’s what I’ve learned (sometimes the hard way):
- Tempering Isn’t a Must: Because we’re storing these in the fridge and using them quickly, you don’t need to temper your chocolate. Just melt it gently—overheating leads to grainy shells.
- Double Coat = No Leaks: Always add a second layer of chocolate to the sides and bottom if you see any thin spots after the first chill. This keeps all the cocoa goodness inside when you pour on the milk.
- Use a Pastry Brush for Smooth Sides: While a spoon works, a small brush gives you more control for an even, glossy finish.
- Don’t Overfill: As tempting as it is to pack in more cocoa and marshmallows, leave a little room at the top so you can seal the cup completely. Otherwise, the chocolate lid might not stick.
- Work in Batches: If your kitchen is warm, work with half the cups at a time and keep the rest chilled so the chocolate doesn’t melt while you’re filling.
- Avoid Moisture: Water and chocolate are enemies! Dry your molds and tools thoroughly before starting, or you’ll end up with seizing (yep, I’ve done it!).
My biggest lesson? Don’t rush the chilling steps—patience really does make a difference in how easy these are to unmold and seal. And don’t worry if a shell cracks; just “glue” it back together with a little extra melted chocolate. They’ll still work their magic. Once you get the hang of the chocolate shell, you’ll want to make these for every holiday!
Variations & Adaptations
The best thing about peppermint hot cocoa bomb cups is how easy they are to customize for different tastes, diets, and occasions. Here are a few of my favorite twists:
- Vegan/Dairy-Free: Use vegan chocolate chips and coconut milk powder. Swap marshmallows for a vegan version (Dandies is great). Make sure your peppermint candies are gelatin-free.
- White Chocolate Peppermint: Use white chocolate chips for the shells and swirl in a pinch of red food coloring for a candy-cane look.
- Mocha Bombs: Add 1 tbsp (5 g) instant espresso powder to the cocoa mix for a grown-up, peppermint mocha vibe.
- Seasonal Flavors: Try orange extract and candied orange peel instead of peppermint for a winter citrus twist, or sprinkle in cinnamon and nutmeg for a cozy spiced version.
- Nut-Free: Double-check your chocolate, candies, and cocoa for cross-contamination if making for folks with allergies.
Personally, I’ve tried a version with a hint of chili powder and cinnamon—like a Mexican hot chocolate meets candy cane, and it’s wild (in a good way!). You can even swap the cocoa mix for your favorite store-bought blend if you’re in a hurry. These are endlessly adaptable, so don’t be afraid to make them your own.
Serving & Storage Suggestions
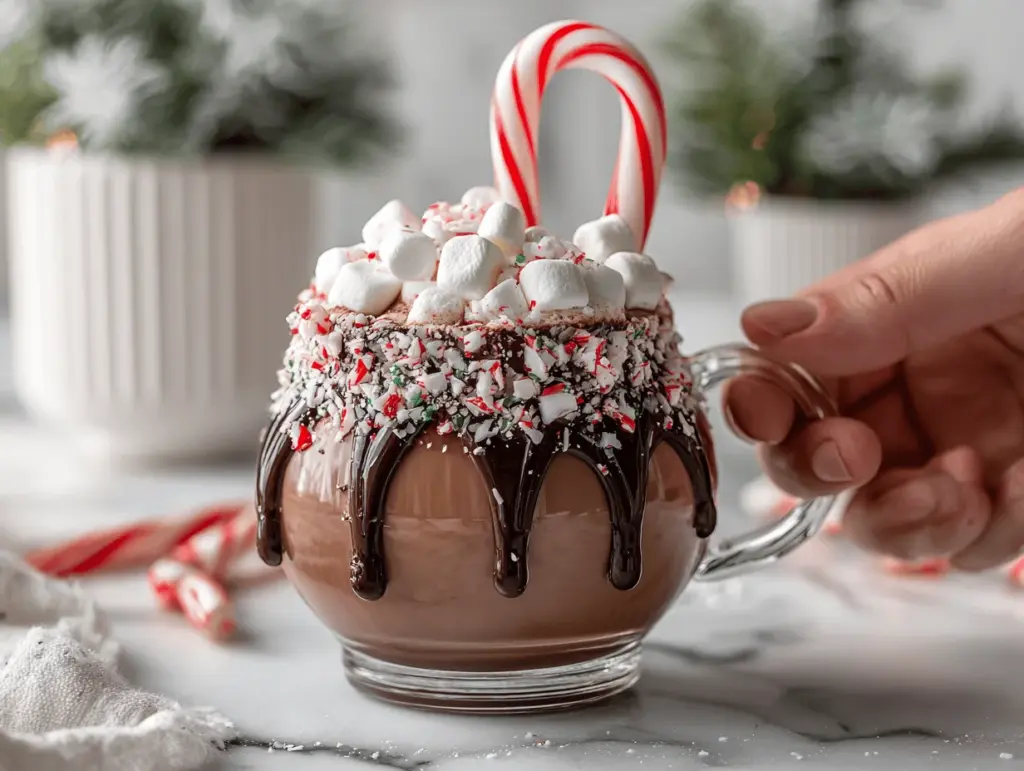
For that true Pinterest-worthy moment, serve peppermint hot cocoa bomb cups in clear glass mugs so you can see the chocolate shell melt and the marshmallows rise. Top with extra whipped cream and a mini candy cane hooked on the rim—trust me, it’s a showstopper.
Pair with buttery shortbread cookies, gingerbread men, or even a plate of chocolate-dipped pretzels for the ultimate holiday treat spread. These cups also make adorable party favors or teacher gifts—just wrap each in a cellophane bag with a ribbon and attach a tag with serving instructions.
Store finished bomb cups in an airtight container in the fridge for up to 2 weeks. For longer storage, freeze in a sealed bag for up to 2 months (let thaw at room temperature before using so the chocolate doesn’t crack). To reheat, simply pour hot milk over a cup and stir—don’t microwave the chocolate cups directly, or you’ll risk a melty mess. The peppermint flavor actually gets stronger after a day or two, so making these ahead is a win.
Nutritional Information & Benefits
On average, each peppermint hot cocoa bomb cup contains about 180–220 calories, 5g fat, 36g carbs, and 2g protein. The exact values will vary based on the chocolate and cocoa mix you use.
Peppermint is known for its soothing digestive benefits and can freshen your breath (not a bad holiday bonus!). Dark chocolate brings antioxidants, and making these at home means you control the sugar and dairy content. Easily adaptable for gluten-free, nut-free, and vegan diets—just check your ingredients. If you’re watching sugar, try a sugar substitute in the cocoa mix. Personally, I find one cup is the perfect treat to warm up without overdoing it.
Conclusion
If you’re searching for a festive treat that’s as fun to make as it is to share, these peppermint hot cocoa bomb cups are your new holiday tradition. They’re easy, eye-catching, and totally customizable—plus, you don’t need any fancy equipment or superhuman baking skills.
Every year, I love seeing how friends and family put their own spin on this recipe. Maybe you’ll add extra marshmallows, swap flavors, or hand them out at your holiday party—whatever you do, don’t forget to savor that first magical, melty sip. Honestly, these cocoa bomb cups have become my secret weapon for spreading holiday cheer (and they never last long!).
Ready to make your own? Let me know how it goes in the comments below! Share your creative twists, tag me in your Pinterest photos, or pass the recipe along to a fellow chocolate lover. Happy sipping and happy holidays!
FAQs About Peppermint Hot Cocoa Bomb Cups
How long do peppermint hot cocoa bomb cups last?
Stored in the fridge, they stay fresh for up to 2 weeks. You can freeze them for up to 2 months—just thaw before using so the chocolate doesn’t crack.
Can I use store-bought hot cocoa mix instead of homemade?
Absolutely! If you’re short on time, just fill your cups with your favorite store-bought cocoa mix and follow the rest of the steps as written.
Do I have to use silicone molds?
Nope—paper cupcake liners in a muffin tin work, too. Just peel them off gently once the chocolate is fully set.
How do I keep the chocolate from cracking?
Let chocolate shells warm up for a minute before unmolding, and don’t rush the chilling steps. If a shell does crack, patch it with a little extra melted chocolate.
Can I make these without peppermint?
Definitely! Just leave out the peppermint extract and candies. Try vanilla, orange, or almond extract for a different flavor profile—make it your own!
Pin This Recipe!
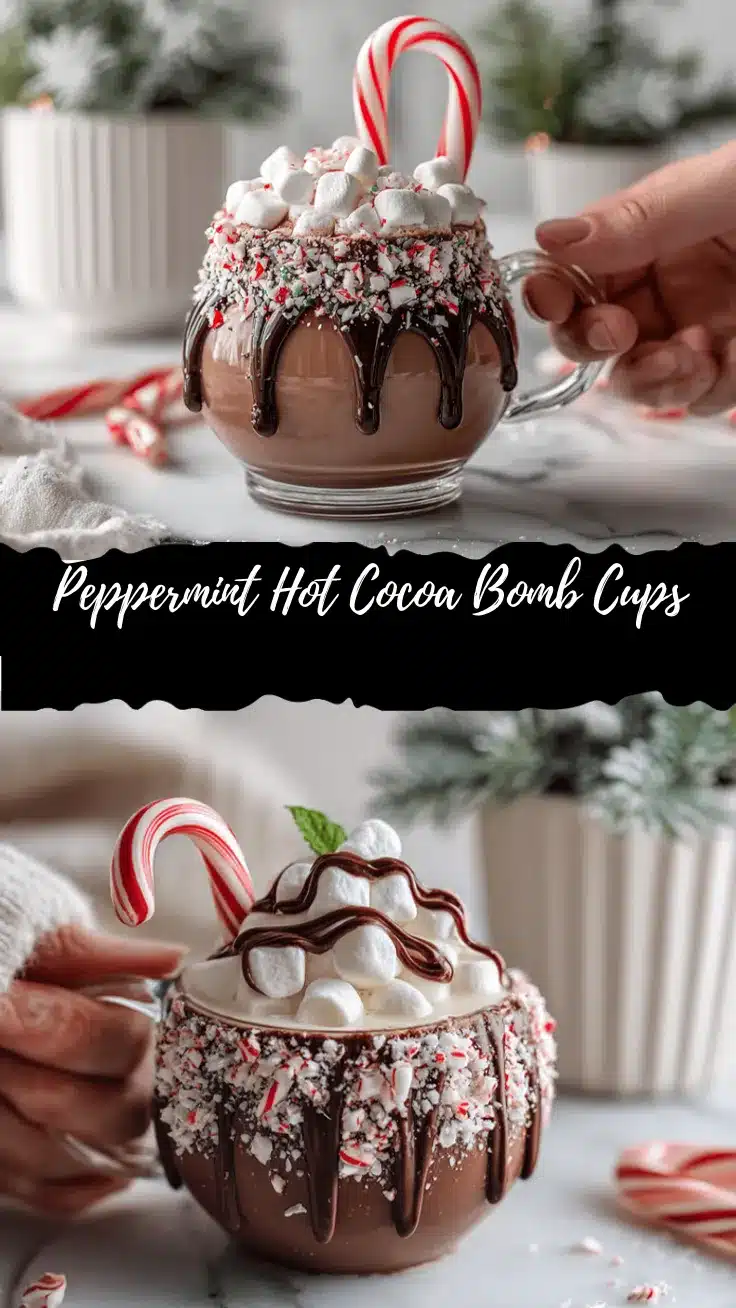

Peppermint Hot Cocoa Bomb Cups
- Total Time: 30 minutes
- Yield: 12 cups 1x
Description
These Peppermint Hot Cocoa Bomb Cups are a festive, easy-to-make holiday treat featuring a chocolate shell filled with homemade peppermint cocoa mix, marshmallows, and crushed candy canes. Perfect for gifting, parties, or cozying up with a mug of creamy, minty hot chocolate.
Ingredients
- 12 oz semisweet or dark chocolate chips (high-quality recommended)
- 1 tsp coconut oil or vegetable shortening (optional)
- 3/4 cup unsweetened cocoa powder
- 1 cup granulated sugar (or coconut sugar)
- 1/2 cup powdered milk or dairy-free milk powder
- 1/4 tsp salt
- 1/2 tsp peppermint extract
- 1/2 cup mini marshmallows (or freeze-dried marshmallows)
- 1/4 cup crushed peppermint candies or candy canes
- Optional: sprinkles, extra chocolate drizzle, or colored sugar for topping
Instructions
- Place chocolate chips and coconut oil in a microwave-safe bowl. Microwave in 20-second bursts, stirring after each, until smooth (about 1–2 minutes total).
- Spoon about 1 tablespoon melted chocolate into each of 12 silicone muffin cups. Use the back of a spoon or a pastry brush to coat the bottom and sides evenly. Chill in the fridge for 10 minutes. Add a second coat if needed and chill again until set (10–15 minutes).
- In a medium bowl, whisk together cocoa powder, sugar, powdered milk, salt, and peppermint extract to make the cocoa mix. Taste and adjust peppermint if desired.
- Carefully peel set chocolate shells from molds. Spoon 2 tablespoons cocoa mix into each cup, then top with 6–8 mini marshmallows and about 1 teaspoon crushed peppermint candy. Leave space at the top.
- Re-melt any leftover chocolate. Spoon a little over the filled cups, smoothing with the back of a spoon to cover the filling. Quickly sprinkle more crushed peppermint or sprinkles on top before the chocolate sets.
- Place finished cups on a lined baking sheet and refrigerate for at least 15 minutes, or until fully hardened.
- To serve, place a bomb cup in a large mug. Pour 8–10 oz steaming hot milk over the top. Watch it melt and stir until smooth and creamy. Enjoy immediately.
Notes
For vegan/dairy-free, use vegan chocolate and coconut milk powder, and vegan marshmallows. Double-coat chocolate shells to prevent leaks. Don’t overfill cups to ensure a good seal. Store in the fridge for up to 2 weeks or freeze for up to 2 months. Let shells warm slightly before unmolding to prevent cracking. Customize with different extracts or toppings for variety.
- Prep Time: 15 minutes
- Cook Time: 15 minutes
- Category: Dessert
- Cuisine: American
Nutrition
- Serving Size: 1 cup (1/12 of recipe, with 8–10 oz hot milk)
- Calories: 200
- Sugar: 28
- Sodium: 80
- Fat: 5
- Saturated Fat: 3
- Carbohydrates: 36
- Fiber: 3
- Protein: 2
Keywords: peppermint hot cocoa bomb, hot chocolate bomb, holiday treat, chocolate cup, peppermint cocoa, Christmas dessert, edible gift, party favor, winter drink, easy holiday recipe