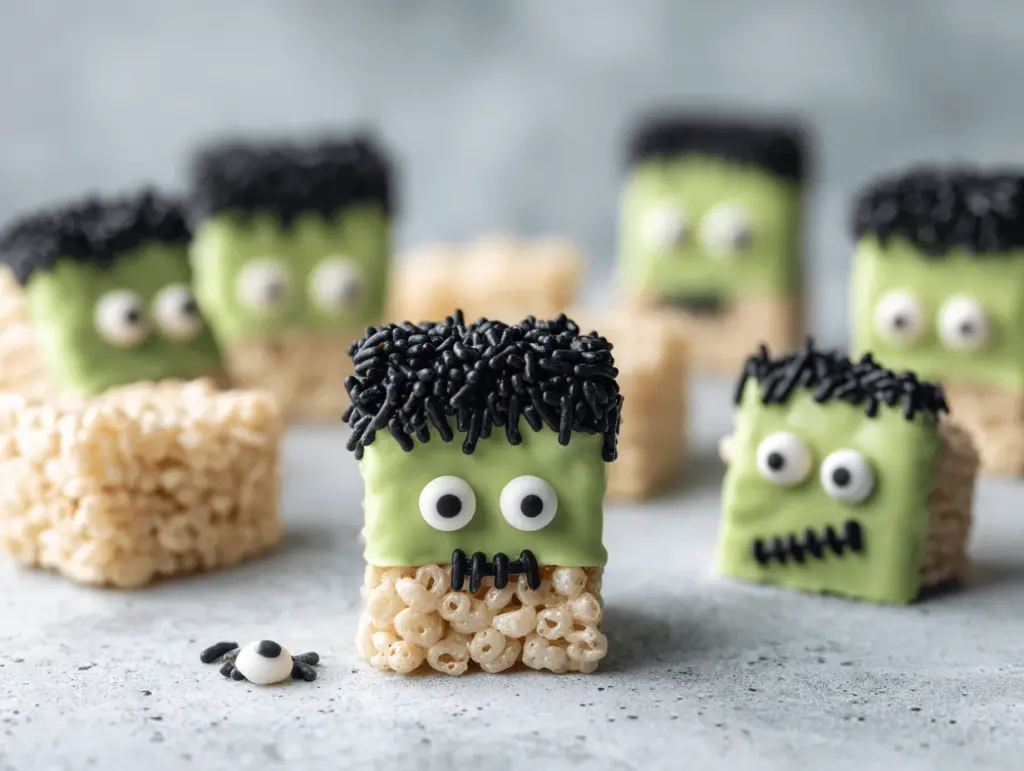
The first time I set a tray of Frankenstein Rice Krispie Treats on the table, the kids shrieked (in the best way). There’s something hilarious about green, googly-eyed squares staring up at you—especially when you know they’re hiding that classic, marshmallowy crunch underneath. The smell of sweet vanilla and toasted cereal is pure nostalgia, but with a monster-twist that turns any Halloween party from basic to unforgettable.
I started making these Frankenstein Rice Krispie Treats after my youngest begged for “spooky snacks” that didn’t have fake blood or anything too creepy. Let’s face it, not every kid wants a realistic severed finger cookie, right? But these treats are just scary enough to bring the fun, without crossing the line. Plus, they’re ridiculously easy to whip up—no baking, barely any prep, and lots of room for creativity (and little helper hands!).
Honestly, I’ve made these for school parties, neighborhood potlucks, and even as a last-minute dessert when I forgot to plan something fun. They never last long. Between the pop of green, the chocolate “hair,” and those silly candy eyes, these Frankenstein Rice Krispie Treats are the snack everyone grabs first—and then asks for the recipe. If you need a Halloween treat that’s kid-friendly, allergy-adaptable, and guaranteed to make people smile, this is it. So, let’s make your next Halloween party a little more spooktacular (and a lot more delicious) with these easy Frankenstein Rice Krispie Treats!
Why You’ll Love This Recipe
- Quick & Easy: These Frankenstein Rice Krispie Treats come together in just 30 minutes. No oven, no fuss—just melt, mix, decorate, and you’re done. Perfect for busy parents, teachers, or last-minute party planners.
- Simple Ingredients: You probably have everything you need already—marshmallows, cereal, butter, and a few decorating bits. No mysterious specialty items or endless grocery lists here.
- Perfect for Halloween Parties: These treats steal the show at any party table. I’ve brought them to class celebrations, work potlucks, and even used them as edible place cards for spooky dinners.
- Crowd-Pleaser: Kids can’t resist the fun design, and adults love the throwback flavor. Every time, I hear, “Wait, you made these?!”—and the compliments don’t stop.
- Unbelievably Delicious: The gooey marshmallow and crispy cereal combo is always a hit, but the addition of a chocolate “hair” layer…well, let’s just say I catch a few grown-ups sneaking seconds.
What sets my Frankenstein Rice Krispie Treats apart? I blend green food coloring right into the melted marshmallow for that even, vibrant monster shade, and use semi-sweet chocolate for the hair because it balances the sweetness. I’ve played with different sprinkles, used mini M&Ms for bolts, and even experimented with vegan marshmallows—so I know this recipe is flexible and forgiving. You don’t have to be a cake decorator to make these look cute (trust me, mine aren’t always perfect, but they always get rave reviews!).
This recipe isn’t just about looks, though. It’s about creating a memory. Whether you’re making them with your kids or showing up to a party with a tray of edible monsters, these treats turn a regular October day into something special. And isn’t that what Halloween is all about?
What Ingredients You Will Need
This recipe brings together pantry staples and a few fun Halloween extras to create treats that are both adorable and delicious. Most of the ingredients are easy to find and many are likely already in your kitchen.
- For the Rice Krispie Base:
- 6 cups (150g) crispy rice cereal (Rice Krispies or any store brand)
- 10 oz (283g) mini marshmallows (I’ve used Jet-Puffed and Dandies for a vegan option—both work well)
- 4 tbsp (56g) unsalted butter (use dairy-free margarine if needed)
- 1 tsp pure vanilla extract (adds warmth; optional but lovely)
- Green gel or liquid food coloring (about 1/2 tsp or until desired shade—gel gives the brightest color)
- For Decorating:
- 1 cup (170g) semi-sweet chocolate chips or melting wafers (for “hair” and bolts)
- Edible candy eyes (available in the baking aisle—choose large or mini, whatever looks funnest to you)
- Black decorating gel or black food coloring pen (for mouth and scar lines)
- Mini marshmallows or mini chocolate candies (for “bolts” on the sides—optional, but the kids always insist!)
- Sprinkles, colored sugar, or mini M&Ms (for extra flair, if you want to go wild)
Ingredient Tips: If you want to keep these gluten-free, check your cereal label (some brands aren’t certified GF). For dairy-free, swap butter for vegan margarine and use allergy-friendly chocolate chips. I find that gel food coloring gives the most even, bold green—liquid works in a pinch, but you may need a bit more.
Substitutions: Don’t have candy eyes? Use a dot of white chocolate and a mini chocolate chip for a DIY version. Vegan marshmallows do work, but you may need to melt them a bit longer (keep stirring!). For nut allergies, skip any nut-based candies or sprinkles—there are plenty of safe options out there now.
Equipment Needed
- Large saucepan or Dutch oven (for melting butter and marshmallows; nonstick is easiest for cleanup)
- Sturdy spatula or wooden spoon (trust me, a silicone spatula is perfect for sticky marshmallow mixing)
- 9×13-inch (23x33cm) baking pan (lined with parchment for easy lifting)
- Large mixing bowl (if you prefer to combine cereal and marshmallow off heat)
- Sharp knife or pizza cutter (for clean, even squares—my favorite trick!)
- Microwave-safe bowl (for melting chocolate)
- Parchment paper or nonstick spray (for lining pan and work surface)
If you don’t have a 9×13-inch pan, you can use two 8×8-inch (20x20cm) pans and make slightly thicker treats. For spreading the sticky mixture, a lightly greased offset spatula is a lifesaver (or just butter your fingers for DIY fun). I’ve used a regular butter knife in a pinch for cutting—just be sure to wipe it between slices.
Budget tip: Dollar store spatulas and pans work just fine for this recipe, and if you bake often, investing in a silicone spatula pays off in the long run (easy to clean, lasts forever!).
How to Make Frankenstein Rice Krispie Treats
- Prep Your Pan: Line a 9×13-inch (23x33cm) baking pan with parchment paper or spray with nonstick spray. Leave a little overhang for easy lifting. This step saves you from wrestling sticky treats out of the pan later!
- Melt the Marshmallow Mixture: In a large saucepan over low heat, melt 4 tbsp (56g) unsalted butter. Add 10 oz (283g) mini marshmallows and stir constantly until fully melted and smooth (about 4 minutes). Remove from heat and stir in 1 tsp vanilla extract and green food coloring—a few drops at a time—until your shade is ghoulishly vibrant. (If the color looks pale, add a bit more gel! Remember, it lightens once the cereal goes in.)
- Mix in Cereal: Pour in 6 cups (150g) crispy rice cereal. Stir quickly and thoroughly with a greased spatula, making sure every piece is coated. If you see dry patches, keep folding—nobody likes a bland bite!
- Press Into Pan: Dump the green, sticky mixture into your prepared pan. Lightly butter your spatula (or your fingers) and press the mixture down evenly. Don’t press too hard, or your treats will be dense instead of chewy. (Aim for about 1-inch thickness.)
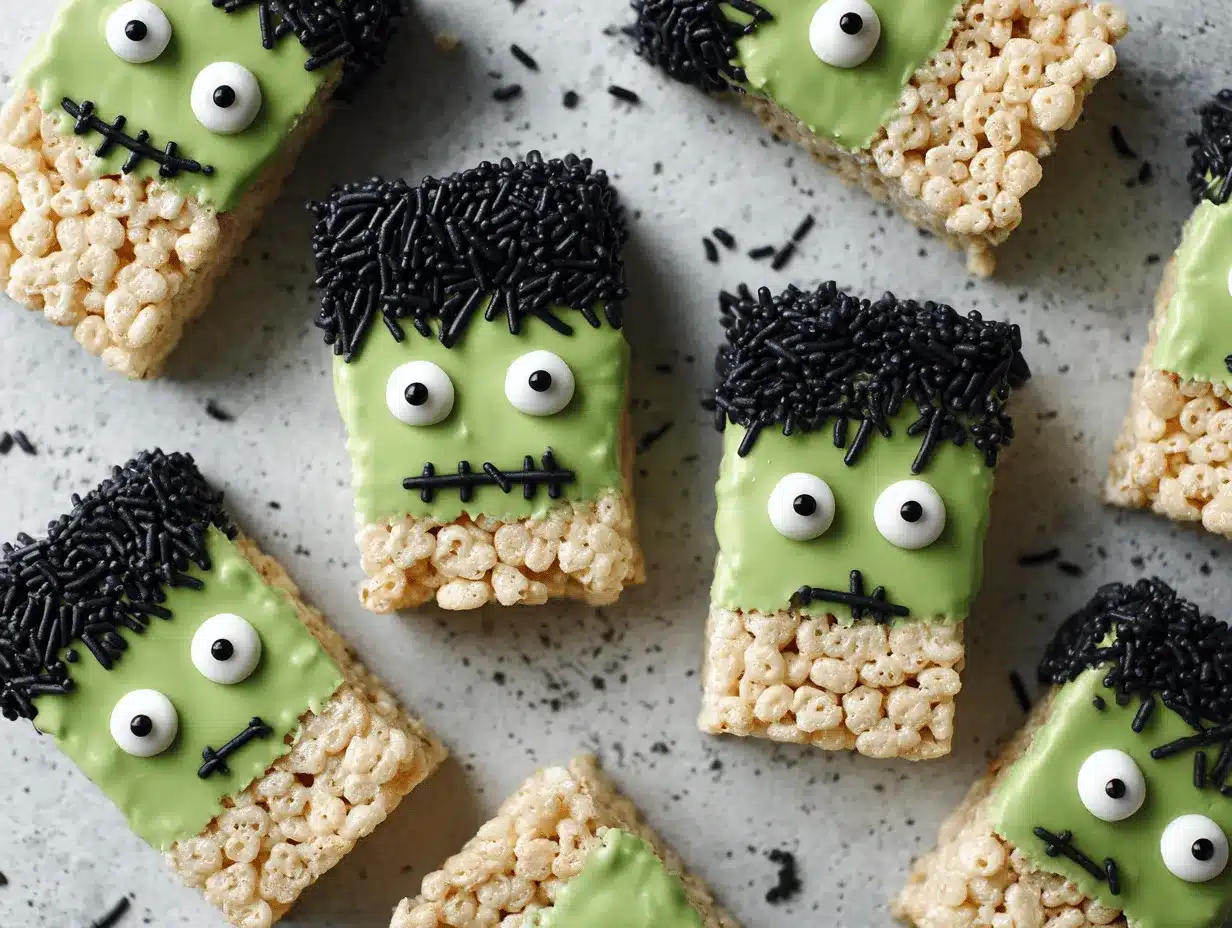
- Cool and Cut: Let the treats cool at room temperature for 20–30 minutes, or pop the pan in the fridge if you’re in a hurry. Once set, lift out using the parchment overhang and cut into rectangles or squares. For Frankenstein, rectangles (about 2×3 inches or 5x8cm) look the most “monster-like.”
-
Decorate Frankenstein Faces:
- Melt 1 cup (170g) chocolate chips in a microwave-safe bowl in 30-second bursts, stirring until smooth. Dip the top third of each treat into the chocolate for “hair.” Place on parchment to set (about 10 minutes).
- Stick on candy eyes while the chocolate is still soft, or use a dab of melted chocolate as glue.
- Draw a wiggly mouth and scar with black decorating gel or a food coloring pen. Let your kids get creative—no two monsters look alike!
- Attach mini marshmallows or chocolate candies to the sides for “bolts.” Again, a dot of melted chocolate works as glue.
- Set and Serve: Allow decorated treats to set at room temp until the chocolate is firm (about 10 minutes, or quicker in the fridge). Serve on a festive platter, and watch the giggles begin!
Troubleshooting: Marshmallow mixture sticking to everything? Grease your spatula and hands. Treats hard as a brick? Next time, use low heat and don’t over-pack the mixture into the pan. If your chocolate “hair” is running, let the treats cool completely before dipping.
Personal Tip: I always set up a decorating station for the kids—less mess on my counters, and it turns treat-making into a Halloween activity!
Cooking Tips & Techniques
- Low and Slow Wins: Melt your butter and marshmallows over low heat. Rushing it with high heat can scorch the sugar and make your treats tough instead of gooey. I learned this the hard way—patience pays off.
- Don’t Over-Pack: Press the mixture gently into your pan. If you smash it down too hard, you’ll end up with dense, hard treats. A light touch keeps them soft and chewy (just use a buttered spatula or wax paper).
- Chocolate Dipping Secret: Let your treats cool completely before dipping in chocolate. Warm treats = runny chocolate. For smooth “hair,” use a wide mug or bowl, and dip just the top third, then let excess drip off before setting down.
- Decorate Fast: Stick on eyes and bolts while the chocolate is still soft, or they won’t stay put. If the chocolate hardens too quickly, a dot of extra melted chocolate works as edible glue.
- Multitasking: Set up an assembly line—while one batch cools, prep your decorations. If you have little helpers, assign tasks (like sticking on eyes or drawing faces)—it’s more fun, and you’ll finish faster.
- Consistency: Use fresh marshmallows for maximum gooeyness. Stale marshmallows won’t melt as smoothly, and old cereal can make your treats taste a bit off. Trust me, it’s worth checking dates!
And remember, perfection isn’t the goal—Frankenstein is supposed to be a little lopsided and silly. Imperfect faces make for the best monsters (and the biggest laughs at parties!).
Variations & Adaptations
- Dye-Free Version: If you’re avoiding artificial colors, try matcha or spinach powder for a more natural green. The flavor is subtle, and kids love the “zombie green” look!
- Allergy-Friendly: Use allergy-friendly marshmallows (like Dandies), vegan butter, and certified gluten-free cereal. For dairy allergies, swap in non-dairy chocolate chips. I’ve made these for nut- and dairy-free classrooms, and they disappear just as fast.
- Flavor Twists: Add a teaspoon of peppermint or almond extract to the marshmallow mixture for a fun twist. Or, mix in crushed Oreos or chocolate chips for a cookies-and-cream Frankenstein. For adults, a pinch of sea salt on the chocolate “hair” is next-level.
If you want to try different shapes, use a cookie cutter and make Frankenstein heads, pumpkins, or ghosts—just adjust the decorating. I’ve even made a giant Frankenstein face in a sheet pan for a party centerpiece—slice and serve like cake!
For gluten-free or vegan needs, double-check your candy eyes and sprinkles, as some brands contain gluten or gelatin. And if you want to skip chocolate altogether, use green frosting for hair and black licorice for mouth and bolts.
My personal favorite? Swapping the candy eyes for mini marshmallow “googly eyes” with chocolate chip pupils. It’s just goofy enough to make everyone smile.
Serving & Storage Suggestions
Serving: Serve your Frankenstein Rice Krispie Treats at room temperature for the best texture—chewy, soft, and just the right amount of gooey. Arrange them on a Halloween-themed tray, or stand them upright in a cauldron-shaped bowl for extra fun. Pair with apple cider, hot cocoa, or a bowl of spooky punch for the full party effect.
Storage: Store treats in an airtight container at room temperature for up to 3 days. If you need to stack them, separate layers with wax or parchment paper so decorations stay intact. For longer storage, wrap tightly and freeze for up to 1 month—just thaw at room temp for about 30 minutes before serving. (I’ve found the texture stays soft even after freezing!)
Reheating: Not really needed, but if your treats firm up too much, a 5-second zap in the microwave brings them back to life—just don’t overdo it, or the chocolate will melt.
Honestly, the flavors get a little richer after sitting overnight, as the marshmallow and chocolate meld together. If you’re making ahead, decorate the day before your party for the freshest look!
Nutritional Information & Benefits
Each Frankenstein Rice Krispie Treat averages about 160 calories, with 3g fat, 32g carbs, and 1g protein (based on standard ingredients and size). They’re nut-free and can be made gluten-free and dairy-free with the right swaps, making them a safe option for most classrooms and parties.
Rice cereal is naturally low in fat, and you can adjust the sugar by using less chocolate or skipping extra decorations. Marshmallows are mostly sugar, so these treats are definitely a “sometimes” food, but they’re a fun way to include everyone in the Halloween festivities.
Potential allergens include dairy (butter, chocolate), gluten (check cereal), and gelatin (marshmallows). Always check your ingredients if you’re serving a crowd with dietary restrictions.
From a wellness perspective, these treats are about joy and memories. Sometimes, that’s the healthiest thing you can serve at a party!
Conclusion
There’s a reason I come back to these Frankenstein Rice Krispie Treats every October—they’re simple, customizable, and never fail to make people smile. Whether you’re a Halloween superfan or just want an easy, family-friendly party snack, these treats check every box.
Don’t be afraid to get creative with the faces or adapt the recipe for your needs. I love seeing how each batch turns out a little different, and honestly, the “ugliest” monsters usually get the most laughs.
If you give these Frankenstein Rice Krispie Treats a try, let me know how they turn out! Share your monster creations in the comments or tag me on social media. Here’s to a spooktacular Halloween—one treat at a time!
FAQs About Frankenstein Rice Krispie Treats
How far ahead can I make Frankenstein Rice Krispie Treats?
You can make them up to 2 days in advance. Just store them in an airtight container at room temperature, and decorate the day before serving for the freshest look.
Can I use jumbo marshmallows instead of mini?
Yes! Just chop them up for faster melting. You’ll need about 40 regular marshmallows to equal a 10 oz bag of minis.
How do I keep the treats from sticking to the pan?
Line your pan with parchment or wax paper, or spray well with nonstick spray. Leave an overhang so you can lift them out easily before cutting.
Are these treats safe for nut allergies?
Yes—as long as you use nut-free cereal and decorations. Always double-check ingredient labels if serving to those with allergies.
Can I make these treats vegan or gluten-free?
Absolutely! Use vegan marshmallows and butter, plus certified gluten-free cereal. Make sure your decorations are allergy-friendly too.
Pin This Recipe!
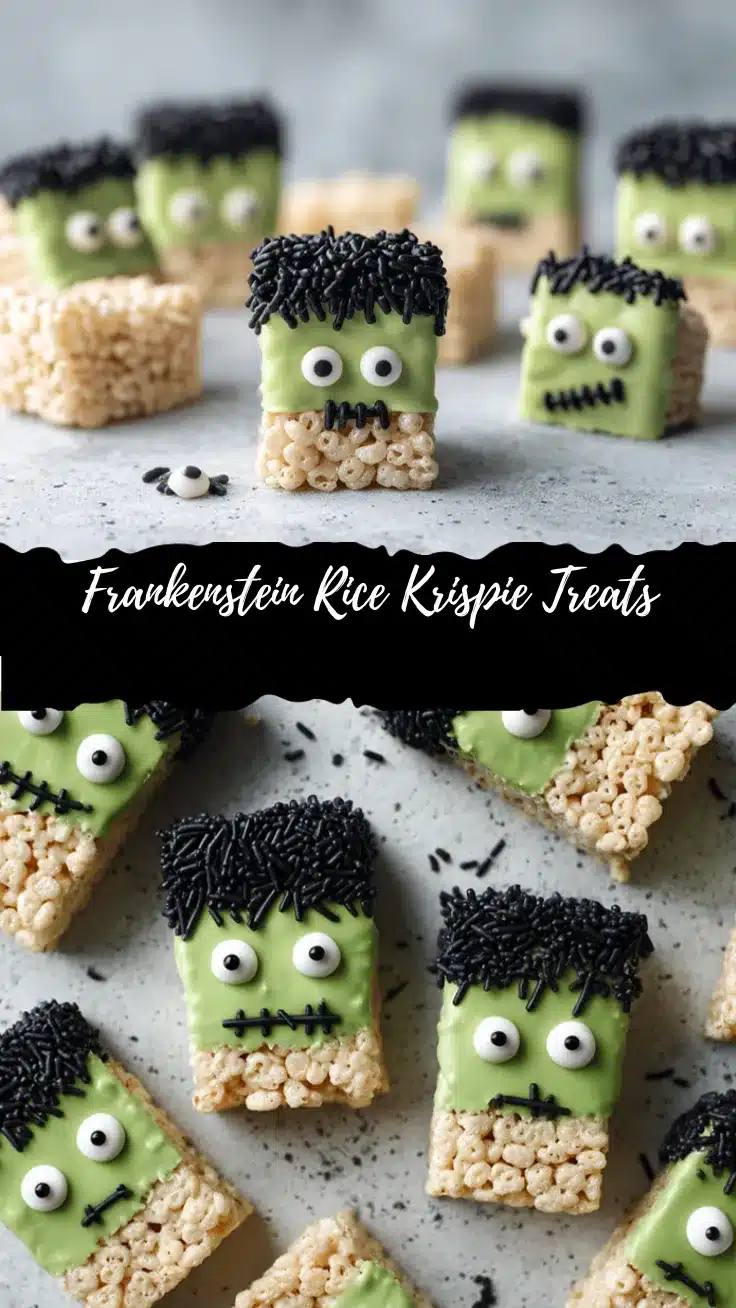
Frankenstein Rice Krispie Treats
- Total Time: 30 minutes
- Yield: 16 treats 1x
Description
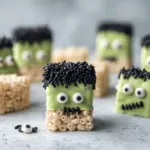
These Frankenstein Rice Krispie Treats are a fun, easy, and kid-friendly Halloween snack featuring classic marshmallowy Rice Krispie treats decorated with chocolate ‘hair’ and candy eyes for a spooktacular party treat. They come together quickly with simple ingredients and are perfect for parties, potlucks, or school events.
Ingredients
- 6 cups crispy rice cereal (Rice Krispies or any store brand)
- 10 oz mini marshmallows (about 5 1/2 cups)
- 4 tbsp unsalted butter
- 1 tsp pure vanilla extract (optional)
- Green gel or liquid food coloring (about 1/2 tsp or to desired shade)
- 1 cup semi-sweet chocolate chips or melting wafers
- Edible candy eyes
- Black decorating gel or black food coloring pen
- Mini marshmallows or mini chocolate candies (for ‘bolts’, optional)
- Sprinkles, colored sugar, or mini M&Ms (optional, for extra flair)
Instructions
- Line a 9×13-inch baking pan with parchment paper or spray with nonstick spray, leaving an overhang for easy lifting.
- In a large saucepan over low heat, melt the butter. Add mini marshmallows and stir constantly until fully melted and smooth (about 4 minutes). Remove from heat.
- Stir in vanilla extract (if using) and green food coloring, adding a few drops at a time until the desired shade is reached.
- Pour in the crispy rice cereal and stir quickly and thoroughly with a greased spatula until evenly coated.
- Transfer the green mixture into the prepared pan. Lightly butter your spatula or fingers and gently press the mixture evenly into the pan (about 1-inch thick).
- Let the treats cool at room temperature for 20–30 minutes, or chill in the fridge to speed up setting.
- Once set, lift out using the parchment overhang and cut into rectangles or squares (about 2×3 inches for Frankenstein shapes).
- Melt chocolate chips in a microwave-safe bowl in 30-second bursts, stirring until smooth. Dip the top third of each treat into the chocolate for ‘hair.’ Place on parchment to set (about 10 minutes).
- Stick on candy eyes while the chocolate is still soft, or use a dab of melted chocolate as glue.
- Draw a mouth and scar with black decorating gel or a food coloring pen.
- Attach mini marshmallows or chocolate candies to the sides for ‘bolts’ using melted chocolate as glue (optional).
- Allow decorated treats to set at room temperature until the chocolate is firm (about 10 minutes). Serve and enjoy!
Notes
For best results, use fresh marshmallows and cereal. Press the mixture gently into the pan for chewy treats. Decorate quickly before the chocolate sets. For allergy-friendly treats, use vegan marshmallows, dairy-free butter, and certified gluten-free cereal. Store in an airtight container at room temperature for up to 3 days or freeze for up to 1 month.
- Prep Time: 10 minutes
- Cook Time: 5 minutes
- Category: Dessert
- Cuisine: American
Nutrition
- Serving Size: 1 treat (about 2x3 inches)
- Calories: 160
- Sugar: 16
- Sodium: 90
- Fat: 3
- Saturated Fat: 2
- Carbohydrates: 32
- Protein: 1
Keywords: Halloween, Rice Krispie Treats, Frankenstein, Kid-Friendly, Party Snack, No Bake, Marshmallow, Chocolate, Easy Dessert, Allergy Friendly