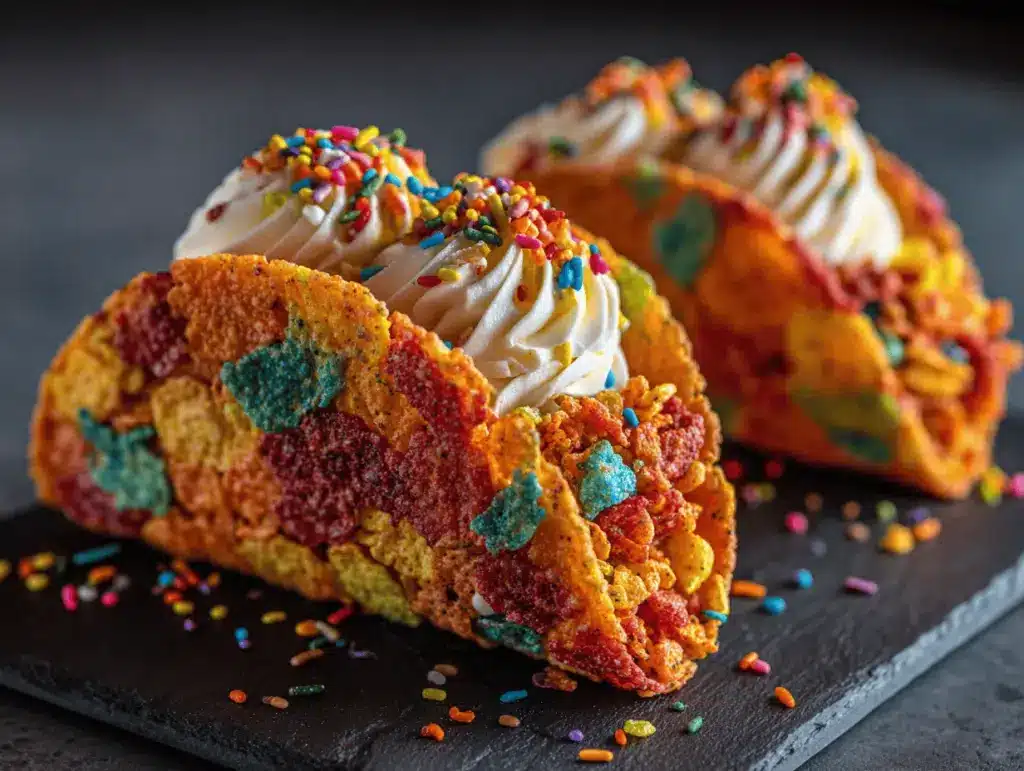
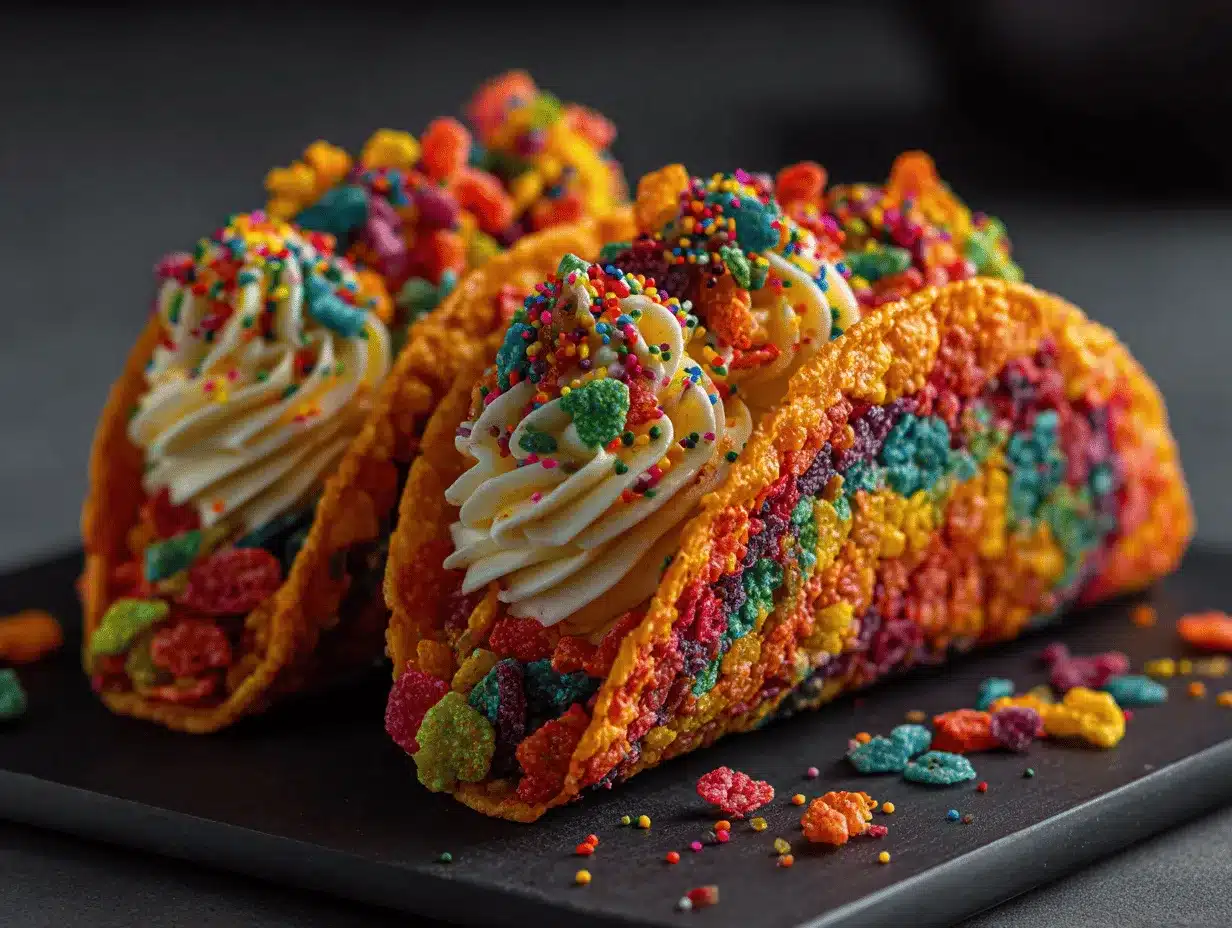
The first time I took a bite of a Fruity Pebbles Cheesecake Taco, I honestly couldn’t stop grinning. Imagine a crunchy shell bursting with colorful Fruity Pebbles, filled to the brim with creamy cheesecake fluff, and topped with a rainbow of sprinkles. It’s like every kid’s dessert dream come true—and let’s face it, adults can’t resist either! These cheesecake tacos are whimsical, nostalgic, and downright fun.
I stumbled onto the idea during my daughter’s birthday party prep, hunting for a sweet treat that would wow both kids and grown-ups. After some kitchen experiments (and one very sticky stovetop incident), this recipe became our new family favorite. Fruity Pebbles Cheesecake Tacos are easy to make, outrageously delicious, and guaranteed to steal the show at any gathering. Plus, the colors! You can’t help but snap a photo before that first, glorious bite.
If you’ve got fond memories of Saturday morning cartoons and cereal bowls piled high with Fruity Pebbles, this recipe is your new happy place. Not only is it a conversation starter, but it’s also perfect for birthday parties, summer cookouts, potlucks, or just a playful baking day with the kids. I’ve tweaked and tested this recipe a bunch of times, and every version just gets better. Whether you’re a seasoned baker or a total newbie, you’ll have a blast making (and eating!) these Fruity Pebbles Cheesecake Tacos.
Why You’ll Love This Recipe
- Quick & Easy: You can whip up a batch of Fruity Pebbles Cheesecake Tacos in about 30 minutes—perfect for last-minute dessert emergencies or spontaneous family fun.
- Simple Ingredients: No fancy trips to specialty stores required. Chances are, everything you need is already hanging out in your pantry or fridge.
- Perfect for Parties: These colorful tacos are a total crowd-pleaser at birthday parties, family BBQs, or sleepovers. Kids and adults both go wild for them.
- Show-Stopping Presentation: Just look at those colors! Fruity Pebbles bring all the happy vibes, and the taco shape is delightfully unexpected.
- Customizable: You can easily tweak the filling, toppings, or even the cereal for a personalized twist.
What sets my version apart? After a few trial runs, I found the secret is in the shell. Instead of just pressing cereal into a tortilla or using a basic sugar cone, I mix marshmallows with Fruity Pebbles and shape them into perfect taco shells. The result: a firm, crispy shell that holds up to all that creamy cheesecake filling—no soggy tacos here! The filling itself is a fluffy, not-too-sweet blend of cream cheese and whipped cream, so you get that classic cheesecake flavor without the need to bake.
Honestly, these Fruity Pebbles Cheesecake Tacos are more than a treat—they’re a mood booster. The colors scream fun, the flavors are pure nostalgia, and the first crunchy, creamy bite is like a little party in your mouth. Whether you’re trying to impress a crowd or just have fun with your kids on a rainy afternoon, this recipe is the kind that brings everyone together for a few sweet moments.
What Ingredients You Will Need
This recipe uses playful, familiar ingredients to create a dessert that feels both nostalgic and new. Here’s everything you’ll need to make Fruity Pebbles Cheesecake Tacos at home:
- For the Taco Shells:
- Fruity Pebbles cereal – 3 cups (crunchy, colorful, and the star of the show)
- Mini marshmallows – 4 cups (about 200 grams; helps bind the cereal for sturdy shells)
- Unsalted butter – 3 tablespoons (melted, to keep things rich and delicious)
- Nonstick cooking spray (for shaping and keeping everything from sticking)
- For the Cheesecake Filling:
- Cream cheese – 8 ounces (225 grams; softened, for a creamy base—Philadelphia is my go-to)
- Powdered sugar – 1/2 cup (60 grams; for just the right amount of sweetness)
- Heavy whipping cream – 1 cup (240 ml; whipped for extra fluffiness)
- Vanilla extract – 1 teaspoon (for that classic cheesecake flavor)
- For Toppings (Optional but highly recommended):
- More Fruity Pebbles cereal (for garnish and extra crunch)
- Rainbow sprinkles (because why not?)
- Fresh strawberries or berries (sliced, for a fruity pop—totally optional but yummy)
- White chocolate drizzle (melted, for a fancy touch)
Ingredient tips: Use fresh, soft marshmallows—they melt better and help the shells hold their shape. For the cream cheese, let it come to room temp so your filling mixes up smooth and lump-free. If you’re feeling creative, swap Fruity Pebbles with Cocoa Pebbles for a chocolatey twist, or use gluten-free cereal if needed. I’ve tried generic cereal brands, but honestly, the real Fruity Pebbles taste and crunch can’t be beat.
Don’t have heavy cream? You can use store-bought whipped topping in a pinch (about 2 cups), but whipping your own gives the filling a lighter, airier texture. And if you want to make this recipe dairy-free, swap the butter and cream cheese for plant-based versions—just make sure they’re neutral in flavor.
Equipment Needed
- Large microwave-safe bowl (for melting marshmallows and butter together)
- Wooden spoon or silicone spatula (nonstick is your friend here—trust me, marshmallow is sticky!)
- Baking sheet or tray (for cooling and shaping the taco shells)
- Rolling pin or glass (for flattening the shells; even a can works in a pinch)
- Small bowls or cups (to drape and shape the taco shells—use whatever you have, even mugs!)
- Hand mixer or stand mixer (for whipping the cheesecake filling; a sturdy whisk will work if you’re feeling strong)
- Piping bag or zip-top bag (for a neat filling, but you can totally spoon it in too)
I’ve made these with both silicone and metal baking sheets—they both work, but silicone makes cleanup easier. If you don’t have a rolling pin, a heavy glass or even a water bottle does the job. For shaping the shells, upturned muffin tins or even small soup bowls have saved the day more than once. My only real tip: spray your tools with a little nonstick spray. Sticky marshmallows have a mind of their own!
If you’re on a budget, there’s no need for fancy gadgets. Everything here is probably already in your kitchen. Just remember to clean your tools quickly after making the shells—marshmallow glue is no joke if it dries on!
Preparation Method
-
Prepare the Taco Shells:
Line a baking sheet with parchment paper and spray with nonstick cooking spray. In a large microwave-safe bowl, combine 4 cups (200g) mini marshmallows and 3 tablespoons (42g) unsalted butter. Microwave in 30-second bursts, stirring after each, until melted and smooth (about 90 seconds total). - Stir in 3 cups (90g) Fruity Pebbles cereal with a silicone spatula, mixing quickly to coat all the cereal. The mixture will be sticky—work fast!
-
While still warm, scoop out about 1/4 cup (heaping spoonful) of the mixture for each shell. Place onto the prepared baking sheet. Spray your hands with nonstick spray, then flatten each mound into a 4-inch (10 cm) circle.
Tip: If the mixture starts to harden, microwave for an extra 10 seconds to soften. -
Shape the Taco Shells:
While the circles are still pliable, drape them over an upturned muffin tin, rolling pin, or small bowl to create a taco shape. Let cool for 10-15 minutes until firm. (If they break, press them gently back together—marshmallow is forgiving.) -
Make the Cheesecake Filling:
In a mixing bowl, beat 8 ounces (225g) softened cream cheese with 1/2 cup (60g) powdered sugar and 1 teaspoon vanilla extract until smooth and creamy, about 2 minutes. - In a separate bowl, whip 1 cup (240 ml) heavy cream to stiff peaks (about 3-4 minutes with a hand mixer). Gently fold the whipped cream into the cream cheese mixture until fully combined and fluffy.
- Transfer the cheesecake filling to a piping bag or zip-top bag with the corner snipped. Pipe or spoon the filling into each cooled Fruity Pebbles taco shell, filling generously but not overstuffing.
-
Garnish & Serve:
Top each filled taco with extra Fruity Pebbles, sprinkles, and sliced berries if desired. For an extra pop, drizzle with melted white chocolate. - Serve immediately for maximum crunch—or chill in the fridge for up to 30 minutes if you like a slightly softer shell.
Troubleshooting: If the shells turn out too soft, try using a bit less butter next time. If they’re too hard, add a handful more marshmallows. The key is to work fast and shape while warm. For perfectly smooth cheesecake filling, don’t rush the mixing process—no one likes lumpy cheesecake!
My personal tip: Make the shells ahead, store them in an airtight container, and fill just before serving for the best texture and wow factor.
Cooking Tips & Techniques
After making Fruity Pebbles Cheesecake Tacos more times than I can count (and cleaning up a few sticky disasters along the way), I’ve picked up some tricks for foolproof results:
- Work Quickly with Marshmallow: The cereal-marshmallow mix sets up fast! Have your baking sheet, tools, and shaping molds ready before you melt anything.
- Shape While Warm: The shells are only pliable for a few minutes, so don’t let them cool too long before forming the taco shape. If they start to harden, a quick zap in the microwave softens them right up.
- Don’t Overwhip the Cream: For the filling, whip your cream to stiff peaks, but don’t keep going or you’ll end up with butter. Fold gently for a light, mousse-like texture.
- Chill Your Filling: If your kitchen is hot, pop the cheesecake filling in the fridge for 10 minutes before piping. It holds its shape better and won’t melt into the shell.
- Keep Shells Crunchy: Only fill the tacos right before serving. If they sit too long with filling inside, they’ll soften (still tasty, but not as satisfyingly crunchy).
- Cleanup Tip: Soak any sticky bowls and utensils in hot soapy water right after use. Dried marshmallow is a pain to scrub off!
One time, I got distracted with a phone call and let my marshmallow mixture cool too much—it turned into a colorful brick. Lesson learned: multitasking is great, just not when you’re working with fast-setting ingredients!
If you plan to make a big batch, enlist a helper for shaping the shells. It turns the process into a fun, hands-on activity—and you’ll get to the eating part way faster.
Variations & Adaptations
There are so many ways to make Fruity Pebbles Cheesecake Tacos your own. Here are some of my favorite twists:
- Chocolate Lovers: Swap Fruity Pebbles for Cocoa Pebbles and add a tablespoon of cocoa powder to the cheesecake filling. Top with mini chocolate chips.
- Gluten-Free Version: Use gluten-free Fruity Pebbles (some brands are certified gluten-free) and double-check your marshmallows and toppings for hidden gluten.
- Berry Blast: Add chopped strawberries, raspberries, or blueberries to the cheesecake filling for a fresh, tangy contrast to the sweet shell.
- Dairy-Free: Use vegan cream cheese, plant-based butter, and coconut whipped cream for a dairy-free treat. The marshmallows should also be vegan if needed (some brands use gelatin).
- Seasonal Fun: Try using seasonal cereal colors (think Halloween or Christmas versions) for holiday parties and themed gatherings.
I once made a batch using lemon zest and a splash of lemon juice in the filling—so bright and refreshing! You can even try dipping the shells’ edges in melted chocolate for an extra special touch.
Don’t be afraid to mix and match—let your creativity (or the contents of your pantry) guide you. The basic method stays the same!
Serving & Storage Suggestions
Fruity Pebbles Cheesecake Tacos are best enjoyed fresh, when the shells are still extra-crunchy and the filling is light and creamy. Serve them straight from the fridge for a cool treat, or let them sit at room temperature for a few minutes if you prefer a softer bite.
Presentation tip: Arrange the tacos upright in a taco holder or nestled together on a platter. Sprinkle extra Fruity Pebbles and sprinkles over the top just before serving for that eye-catching, Pinterest-worthy look. Pair with fresh berries, fun paper napkins, and maybe a scoop of ice cream on the side for true dessert overload!
Storing leftovers: Unfilled taco shells can be stored in an airtight container at room temperature for up to 2 days (separate layers with wax paper). Keep cheesecake filling refrigerated in a sealed container for up to 3 days. Fill the tacos just before serving to keep them from getting soggy.
To re-crisp softened shells, pop them in a low oven (250°F/120°C) for 2-3 minutes—just watch closely so they don’t melt! You’ll notice the fruity flavors get even more intense after a day in the fridge, which is never a bad thing.
Nutritional Information & Benefits
Each Fruity Pebbles Cheesecake Taco (with filling) contains approximately:
- Calories: 250
- Fat: 12g
- Saturated fat: 7g
- Carbohydrates: 34g
- Sugar: 20g
- Protein: 3g
While this isn’t a “health food” recipe, there are a few perks! The cream cheese filling adds a bit of protein and calcium, and you can lower sugar by using light cream cheese or less powdered sugar. Fruity Pebbles are gluten-free by nature, making this a great option for gluten-sensitive dessert lovers (just check your marshmallows and toppings to be sure).
Allergens: Contains dairy (cream cheese, butter, cream), and may contain gluten (depending on cereal brand). For dairy-free or gluten-free needs, see the adaptation tips above.
From a wellness point of view, I see this recipe as pure joy in taco form—sometimes, happiness is the best ingredient of all!
Conclusion
If you’re looking for a dessert that’s easy, fun, and guaranteed to make people smile, Fruity Pebbles Cheesecake Tacos are your answer. The combination of crunchy, colorful cereal shells and smooth, dreamy cheesecake filling is just irresistible—trust me, I’ve watched entire platters disappear in minutes!
Feel free to play with flavors, colors, and toppings to make these tacos uniquely yours. Every batch brings a little more magic and a lot more smiles to the table. This recipe has become a family favorite in my kitchen, and I hope it does in yours too.
If you try these Fruity Pebbles Cheesecake Tacos, let me know in the comments—what spin did you put on them? Share your photos and tag me so I can see your sweet creations! Now, go grab some cereal and get ready for the most fun you’ll have in the kitchen all week.
Frequently Asked Questions
How do I keep the Fruity Pebbles taco shells from getting soggy?
Fill the shells just before serving. If you prep ahead, store the shells and filling separately, and assemble right before eating for the best crunch.
Can I make these Fruity Pebbles Cheesecake Tacos ahead of time?
You can make the shells and the cheesecake filling a day ahead. Store the shells at room temperature and chill the filling. Assemble when ready to serve.
What if I don’t have a piping bag for the filling?
No worries! Spoon the filling into a zip-top bag, snip the corner, and pipe away. Or just use a spoon—the taste is the same either way.
Can I use a different cereal for the shells?
Absolutely! Cocoa Pebbles, Rice Krispies, or even Cap’n Crunch work well. Each gives the tacos a different flavor and vibe.
Are Fruity Pebbles Cheesecake Tacos gluten-free?
Many Fruity Pebbles brands are gluten-free, but double-check the packaging. Also, make sure your marshmallows and toppings are gluten-free if needed.
Pin This Recipe!
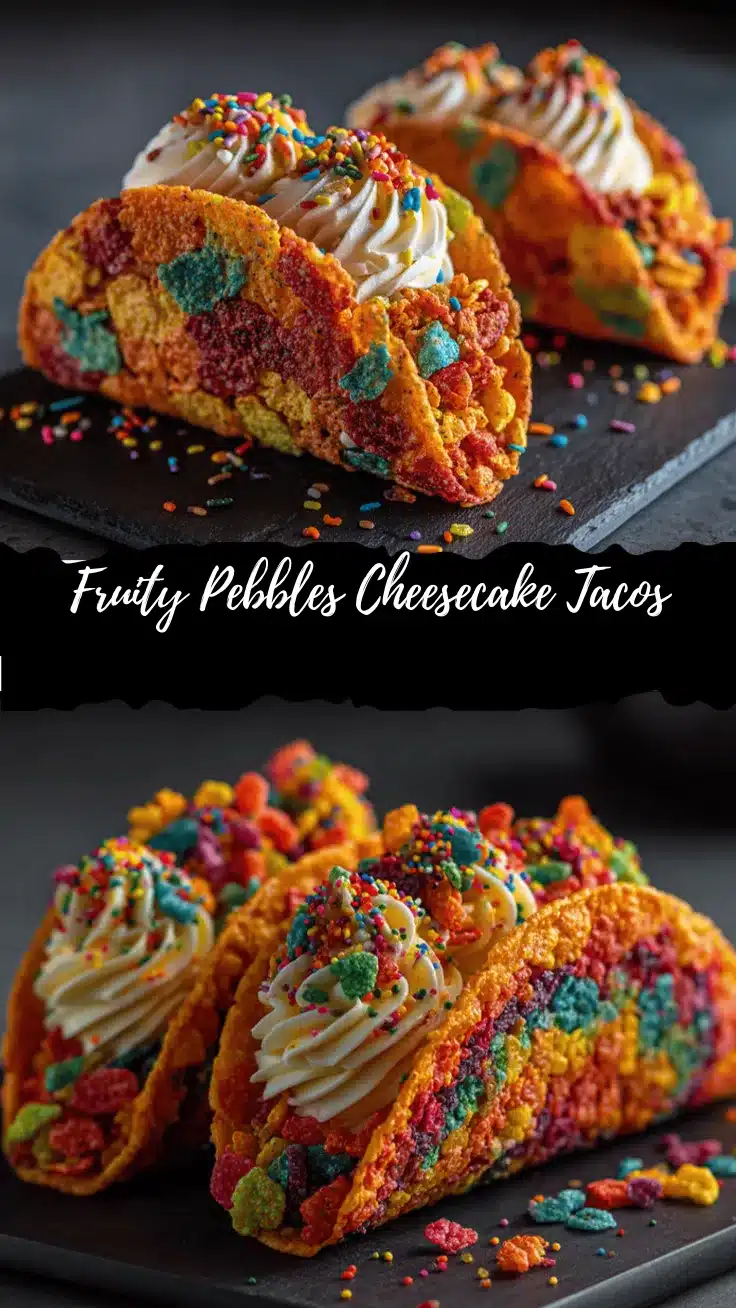

Fruity Pebbles Cheesecake Tacos
- Total Time: 30 minutes
- Yield: 8 tacos 1x
Description
Fruity Pebbles Cheesecake Tacos are a whimsical, colorful dessert featuring crunchy cereal-marshmallow taco shells filled with creamy cheesecake fluff and topped with sprinkles. This easy, no-bake treat is perfect for parties and guaranteed to delight both kids and adults.
Ingredients
- 3 cups Fruity Pebbles cereal
- 4 cups mini marshmallows (about 200 grams)
- 3 tablespoons unsalted butter (melted)
- Nonstick cooking spray
- 8 ounces cream cheese (softened)
- 1/2 cup powdered sugar
- 1 cup heavy whipping cream
- 1 teaspoon vanilla extract
- More Fruity Pebbles cereal (for garnish, optional)
- Rainbow sprinkles (optional)
- Fresh strawberries or berries, sliced (optional)
- White chocolate, melted (for drizzle, optional)
Instructions
- Line a baking sheet with parchment paper and spray with nonstick cooking spray.
- In a large microwave-safe bowl, combine mini marshmallows and unsalted butter. Microwave in 30-second bursts, stirring after each, until melted and smooth (about 90 seconds total).
- Stir in Fruity Pebbles cereal with a silicone spatula, mixing quickly to coat all the cereal.
- While still warm, scoop out about 1/4 cup of the mixture for each shell. Place onto the prepared baking sheet. Spray your hands with nonstick spray, then flatten each mound into a 4-inch circle.
- While the circles are still pliable, drape them over an upturned muffin tin, rolling pin, or small bowl to create a taco shape. Let cool for 10-15 minutes until firm.
- In a mixing bowl, beat softened cream cheese with powdered sugar and vanilla extract until smooth and creamy, about 2 minutes.
- In a separate bowl, whip heavy cream to stiff peaks (about 3-4 minutes with a hand mixer). Gently fold the whipped cream into the cream cheese mixture until fully combined and fluffy.
- Transfer the cheesecake filling to a piping bag or zip-top bag with the corner snipped. Pipe or spoon the filling into each cooled Fruity Pebbles taco shell.
- Top each filled taco with extra Fruity Pebbles, sprinkles, and sliced berries if desired. Drizzle with melted white chocolate if using.
- Serve immediately for maximum crunch, or chill in the fridge for up to 30 minutes for a slightly softer shell.
Notes
Work quickly when shaping the shells, as the marshmallow mixture sets fast. Only fill the tacos just before serving to keep the shells crunchy. For gluten-free needs, use certified gluten-free Fruity Pebbles and marshmallows. Store unfilled shells in an airtight container for up to 2 days. The filling can be made ahead and refrigerated for up to 3 days.
- Prep Time: 20 minutes
- Cook Time: 10 minutes
- Category: Dessert
- Cuisine: American
Nutrition
- Serving Size: 1 taco
- Calories: 250
- Sugar: 20
- Sodium: 120
- Fat: 12
- Saturated Fat: 7
- Carbohydrates: 34
- Protein: 3
Keywords: fruity pebbles, cheesecake tacos, no-bake dessert, kids dessert, party dessert, colorful dessert, cereal dessert, easy dessert, fun dessert, birthday party dessert